Are you struggling with sluggish scrolling or muted movement? Are the default settings in Windows causing rodent rage? Fear not, as there's an easy way to master your mouse malcontent!
Here's a quick and informative guide for changing your mouse's sensitivity in Windows.
Setting the basic mouse movement
When talking about mouse sensitivity, we're referring to how much the cursor moves on the monitor when you shift the mouse in a particular direction. Low sensitivity means you need to move the mouse a lot, in order to get the cursor to shift places.
At the other end of the scale, a tiny nudge of your hand can result in the pointer flying off to the corners of the monitor. You may well want this to happen, or something entirely different, but whatever you want, there are two ways of changing this in Windows 10 and 11.
Let's start with the simplest method: press the Windows key and I together (or click on the Settings cog icon in the Start Menu). From here, select Bluetooth & Devices in the left menu, then the Mouse option in the main menu.
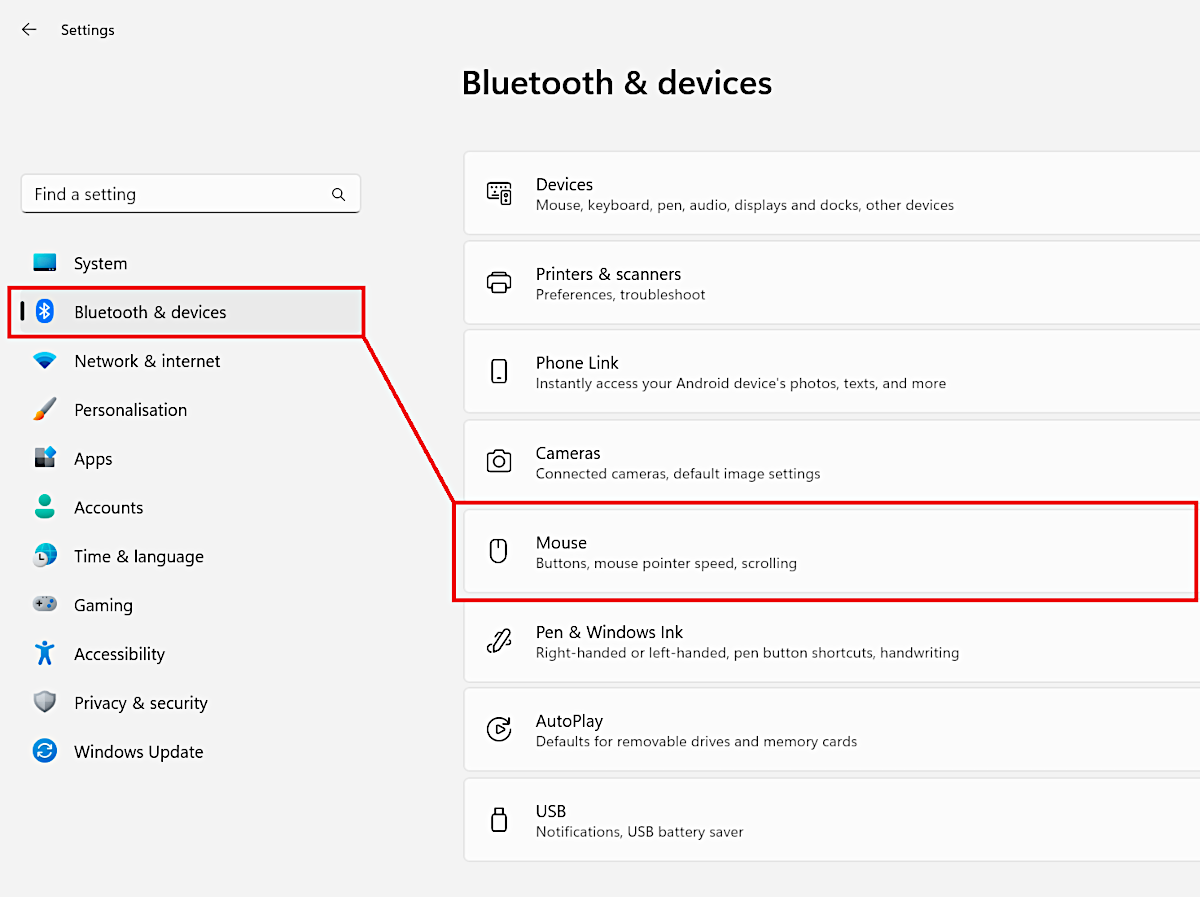
You'll be shown a pretty basic settings screen, but that just makes it easier to quickly change the sensitivity. The mouse pointer speed has a slider, where it ranges from a value of 1 to 20 (slowest to fastest) – the numbers will appear when you click on the slider/button.
Moving this about will cause the sensitivity to change instantly, so if you accidentally drop it down to the slowest speed, it'll take a few moments for you to get it back up to the right level!
It's always best to do small changes to start with and then test them, in a variety of situations (e.g. browsing the web, using a productivity application) to see how it all feels.
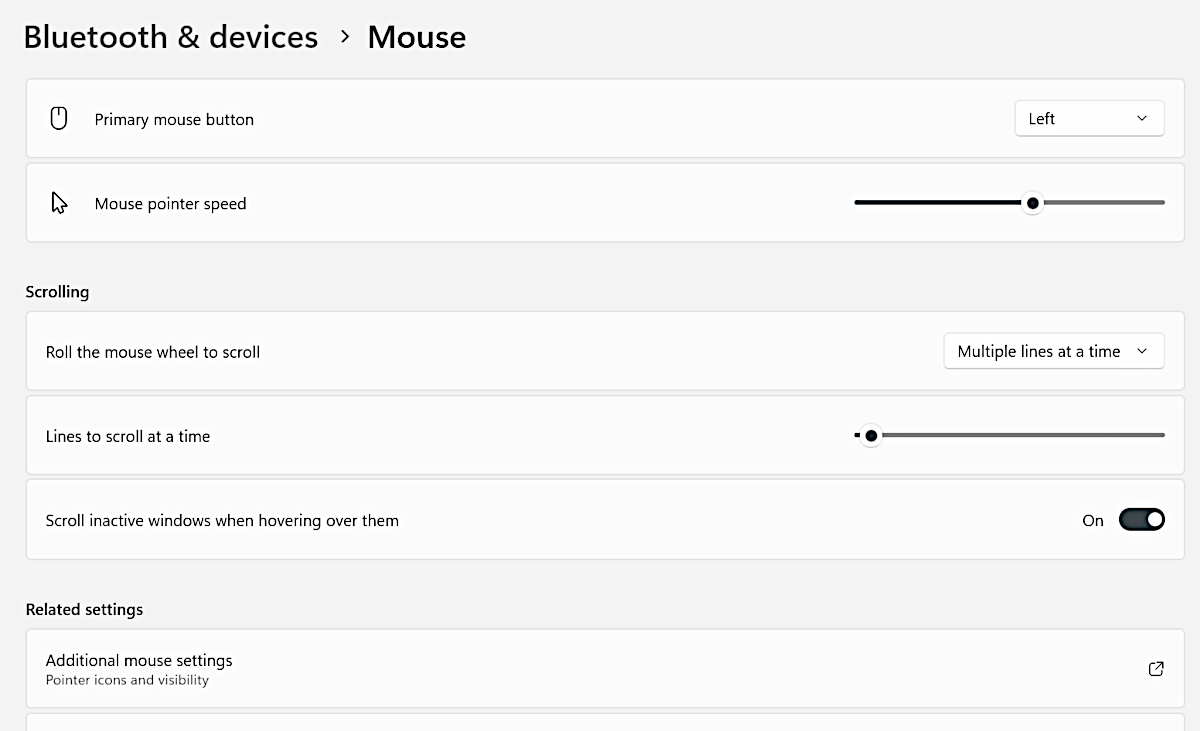
There are options to adjust the mouse wheel sensitivity, too, but before you do that, let's check out the other method for altering mouse settings.
The older Windows Control Panel, accessed further down from the mouse pointer speed, does exactly the same things as Windows Settings, but we find it to be a little more informative, and it has additional things you can alter.
Click on the Additional mouse settings option and a new window, titled Mouse Properties, will open up – we'll refer to this method from now on.
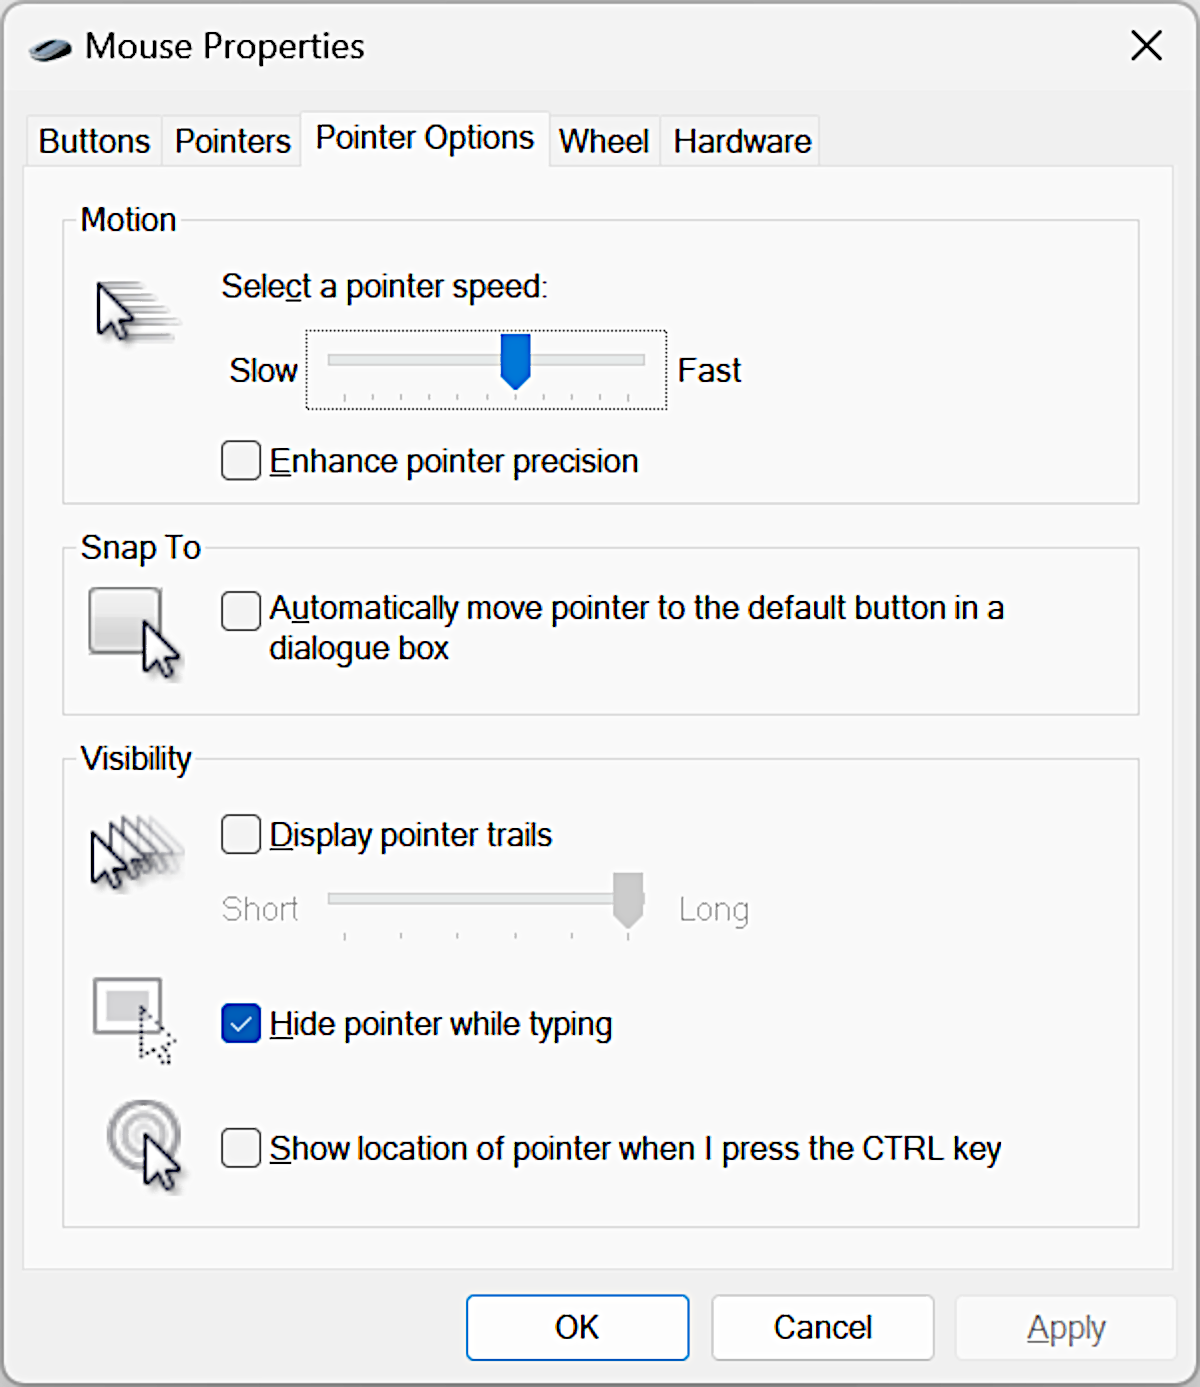
Choose the Pointer Options tab on the top and you will see a slider for pointer speed. Move it to a level you want to test, click on the Apply button, and then you'll be using the new sensitivity.
Note that these two methods are both altering the same settings – one will override the other, but the second one always needs to you to click Apply or OK to make it work.
To enhance or not to enhance?
While we're here, let's cover the Enhance pointer precision option. Activating this, by clicking on the box and then hitting Apply, will then dynamically alter the mouse sensitivity. So the faster you move your mouse, the faster the cursor will move, and vice versa.
Faster is actually the wrong word to use here – it should be acceleration.
So if you go from moving slow to quick, accelerating your motion, the sensitivity will increase and the cursor will then zoom off. This can make it somewhat hard to predict exactly where the cursor will end up.

We actually recommend leaving this disabled, simply because the more you get used to using your mouse, at a fixed sensitivity, the easier it becomes to "learn" how the cursor will react to your input.
Lots of PC games have the same setting in them (mouse acceleration) and we'd recommend disabling it in those, too. It's better to just increase the overall input sensitivity, rather than having an acceleration. While we're still in the mouse's control panel, let's check out some other options.
Get to grips with your DPI
Another important mouse setting that's related to cursor speed or mouse sensitivity is called DPI (dots per inch). A feature most commonly found on gaming and enthusiast-level devices, this setting isn't controlled within Windows, but in the app that comes with your mouse. In some models, it can also be controlled at the hardware level using buttons on the mouse itself.
DPI is in essence how many screen pixels the cursor should move for one inch of mouse movement. The higher the DPI value, the more pixels the cursor will travel, and vice versa.
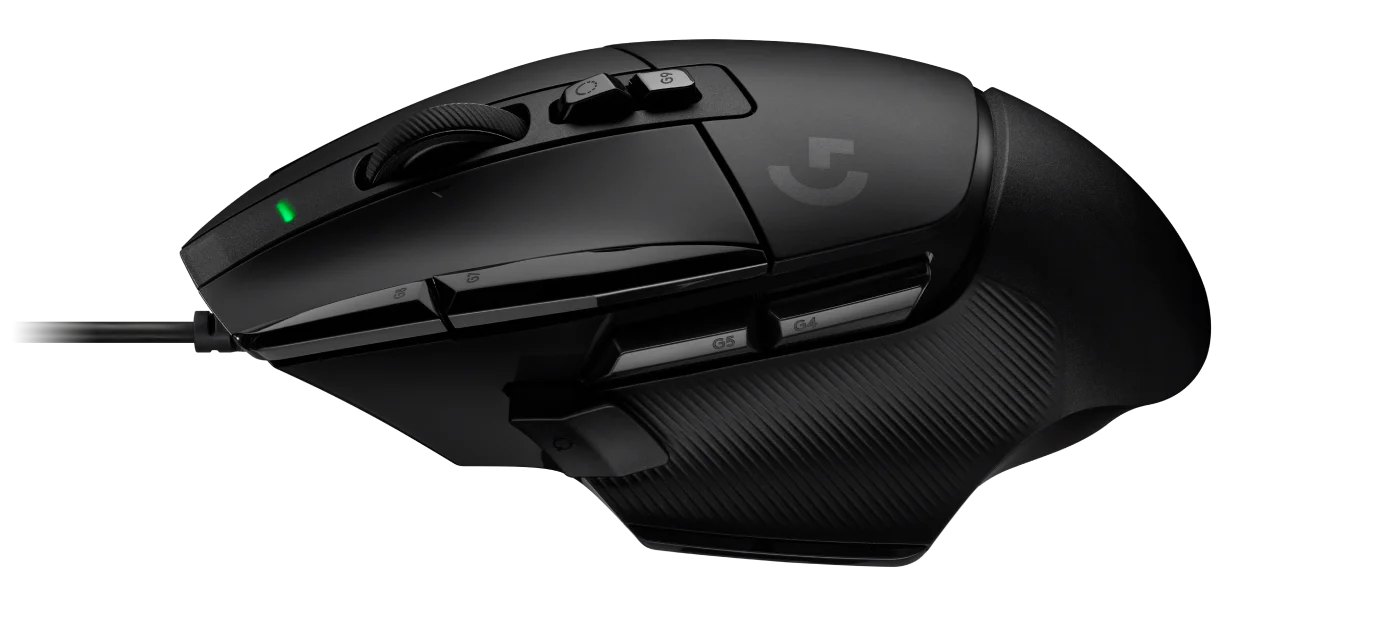
So if you're finding that the motion is too sluggish, try raising the DPI, and if it's too snappy, lower the value. For example, some professional gamers prefer using a very low DPI to improve their fine control over the precision of the crosshair in an FPS game.
This does mean their arms have to move through big arcs across the desk, in order to sweep the camera about, hence why other gamers go with a much higher DPI value, so that they only need to twitch their wrists slightly to get the motion they want.
There's no "best" DPI setting, just like there's no right setting for pointer speed – it's all about personal preference, so don't be afraid to experiment.
Scroll, scroll, scroll your mouse
Even the most basic mice will typically come with a wheel, nestled in between the main buttons. Not only can this function as an additional button, but rolling the wheel back and forth will cause the contents of a window to scroll up and down.
How far it will scroll is set in the control panel – choose the Wheel tab and you'll see options for vertical and horizontal scrolling (the latter requires the appropriate hardware support, though).
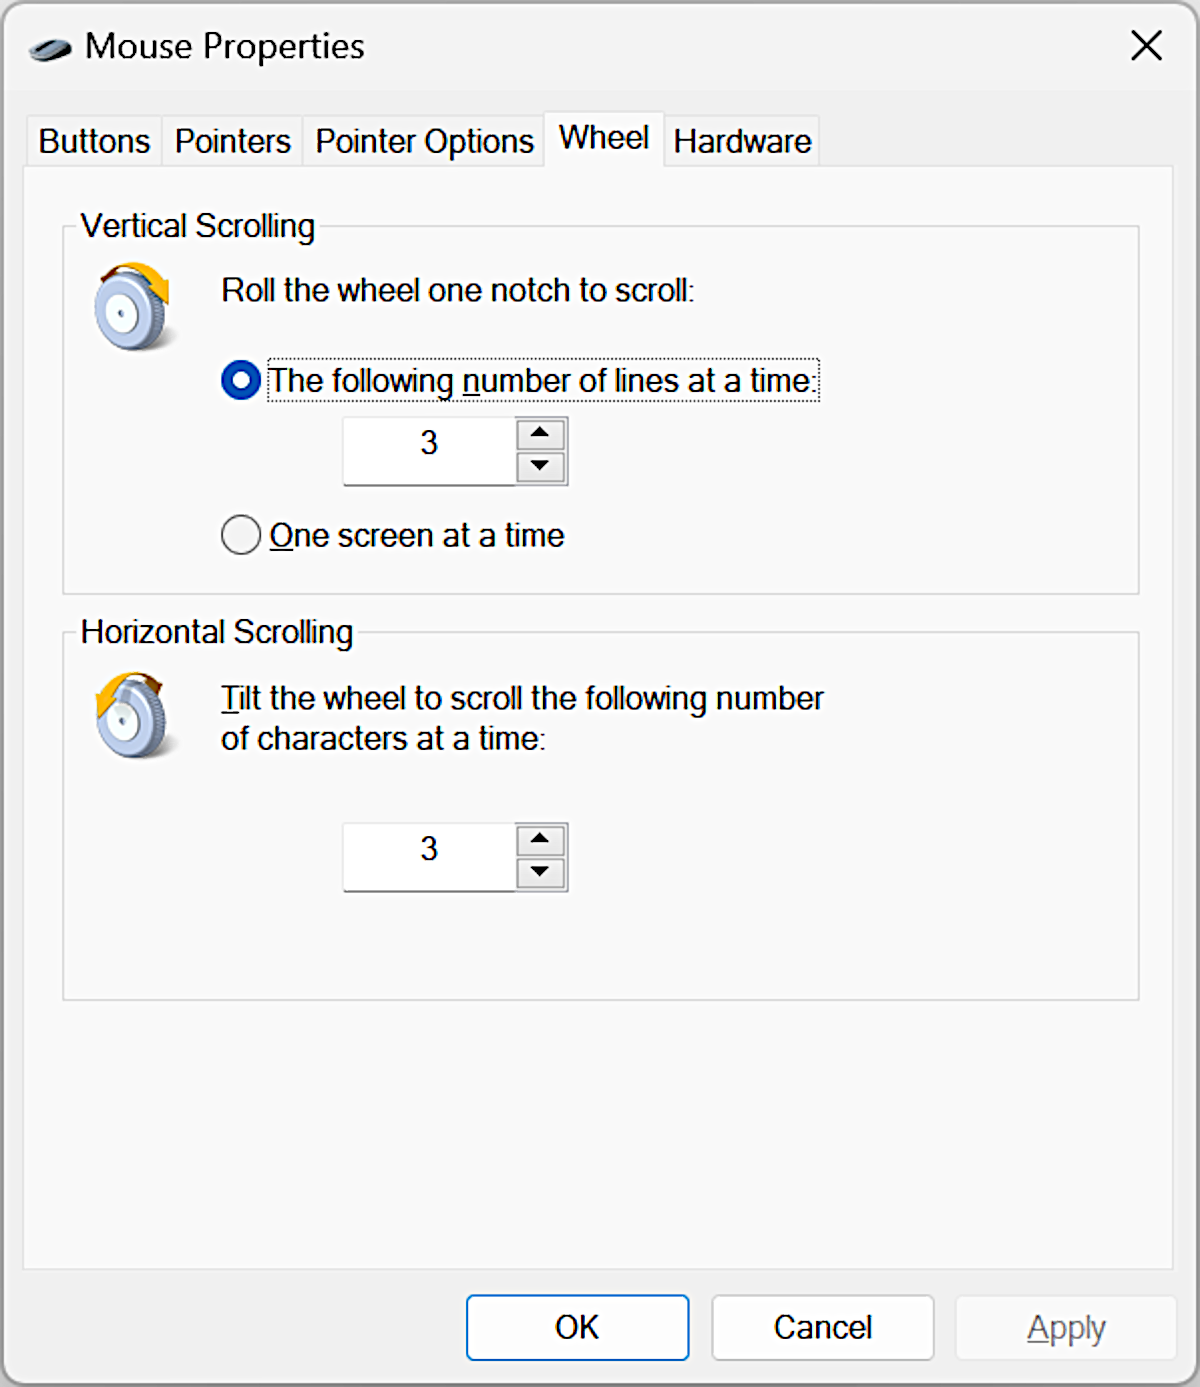
By default, vertical scrolling is set to 3 lines per individual wheel notch rotation, so if you want it to be more sensitive, increase the number of lines. Or, by selecting the second option, you can make the wheel scroll entire pages. We usually like to tweak this on a high-end precision mouse to around 9 lines per scroll.
But, just like with pointer sensitivity, there's no right setting here – it's all about what works for you.
Of course, if you've never altered any of these values over the years of using Windows, then you're going to be most comfortable with the default settings.
Mastering your mouse
Some of the things we've covered (pointer sensitivity, scroll speed) can be changed on the mouse itself – it just depends on what model you have.
The Logitech MX Master 3, for example, has a wheel that can be set to freely scroll, rather than one notch at a time, by simply pressing a button behind the wheel. Cue instant dynamic scroll sensitivity!
Other mice, such as Razer's DeathAdder V2, have plenty of extra buttons but rather them being fixed in function, you can alter what they do via the manufacturer's software.
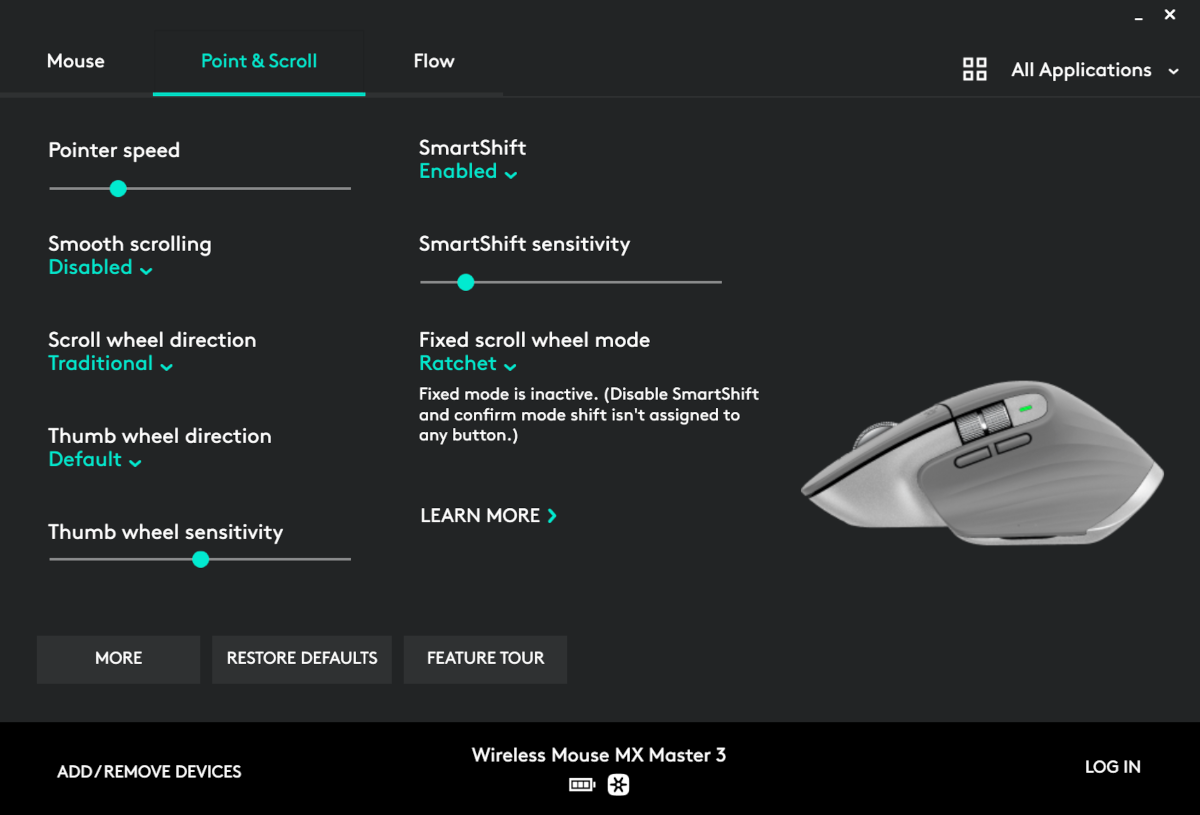
These programs always override any setting in Windows, so if you want to have some consistency with your changes, it's always best to use the same method: Windows Settings, the old Control Panel, or your mouse's maker app.
You'll probably want to experiment a little bit with mouse sensitivity, to get it just right for your needs.
So test away – nothing will get damaged or permanently stuck, and you may well find an optimum setting for mastering your mouse!
Masthead credit: maar gaming
