There's an old expression in the tech world about files: having one copy is the same as having no copies. We often don't realize a document or photo's importance until they are gone. Whether it's a system crash, hardware failure, or accidental deletion, losing important documents is disastrous.
Keeping a backup of the documents, photos, and videos on your computer is essential. What you may not realize is that Windows 10 and 11 come with basic backup capabilities that make it easy to automate the process, so you don't need to buy or install any extra software. Let's look at how you can use File History to keep backups of your important stuff.
What is File History?
File History actively monitors the files you use for changes. When you make a change, a copy of the old version gets made for safekeeping. If you accidentally delete or wreck a file, you can restore it from a list of previous versions the backup software captured.
How many previous file versions get stored depends on your backup device's capacity and how often you make changes to files. The idea is that Windows will manage this automatically over time and make incremental backups.
Setting up File History in Windows 10 and 11
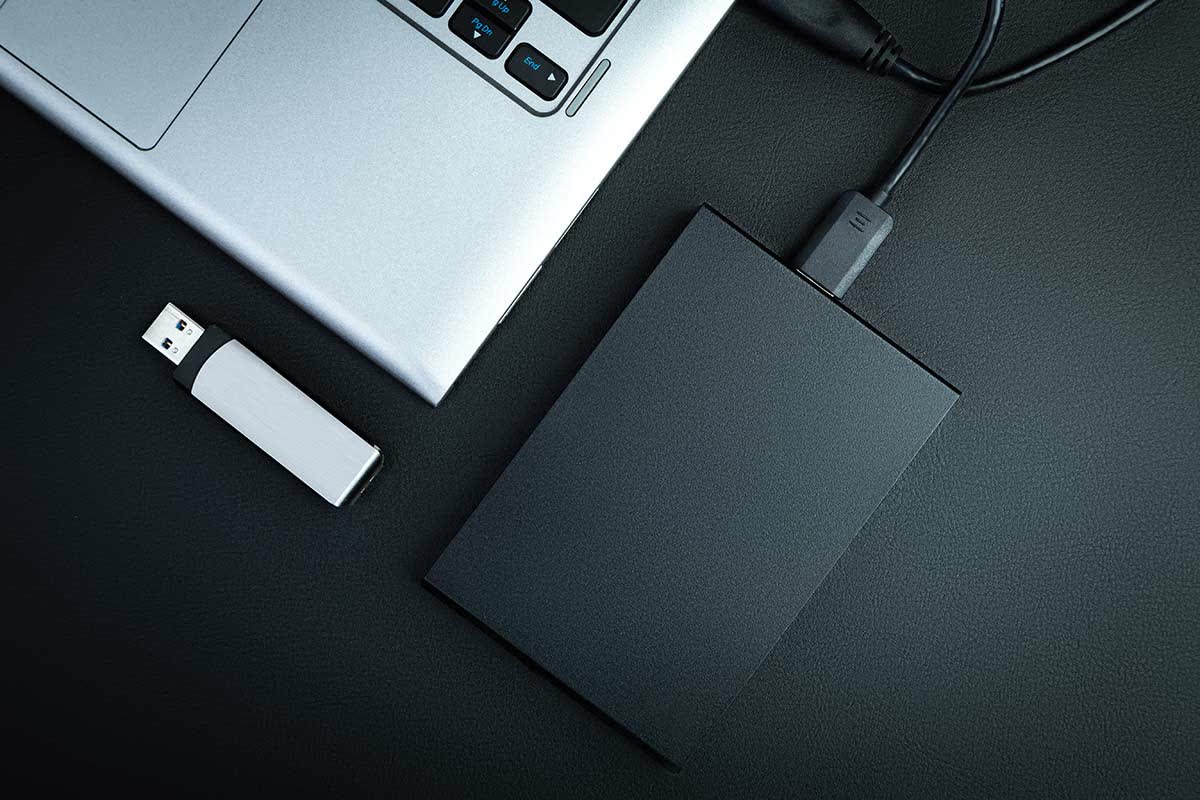
Before setting up File History in Windows, you'll need a place to store your backups. Windows won't let you use any internal drives on your computer as putting your backups in the same place as your originals is bad practice.
It's of little benefit to you if a failing drive takes out your files and their backups. Getting an external storage drive is relatively inexpensive (see our best storage picks here, including external drives), and USB 3.0 transfer speeds are fast enough that backing up and restoring won't take all day.
If you have the extra budget, consider an SSD external drive for even faster retention, but keep in mind that speed might come at a usable lifetime tradeoff. With your external drive connected, you're ready to set up File History in Windows.
Windows 10
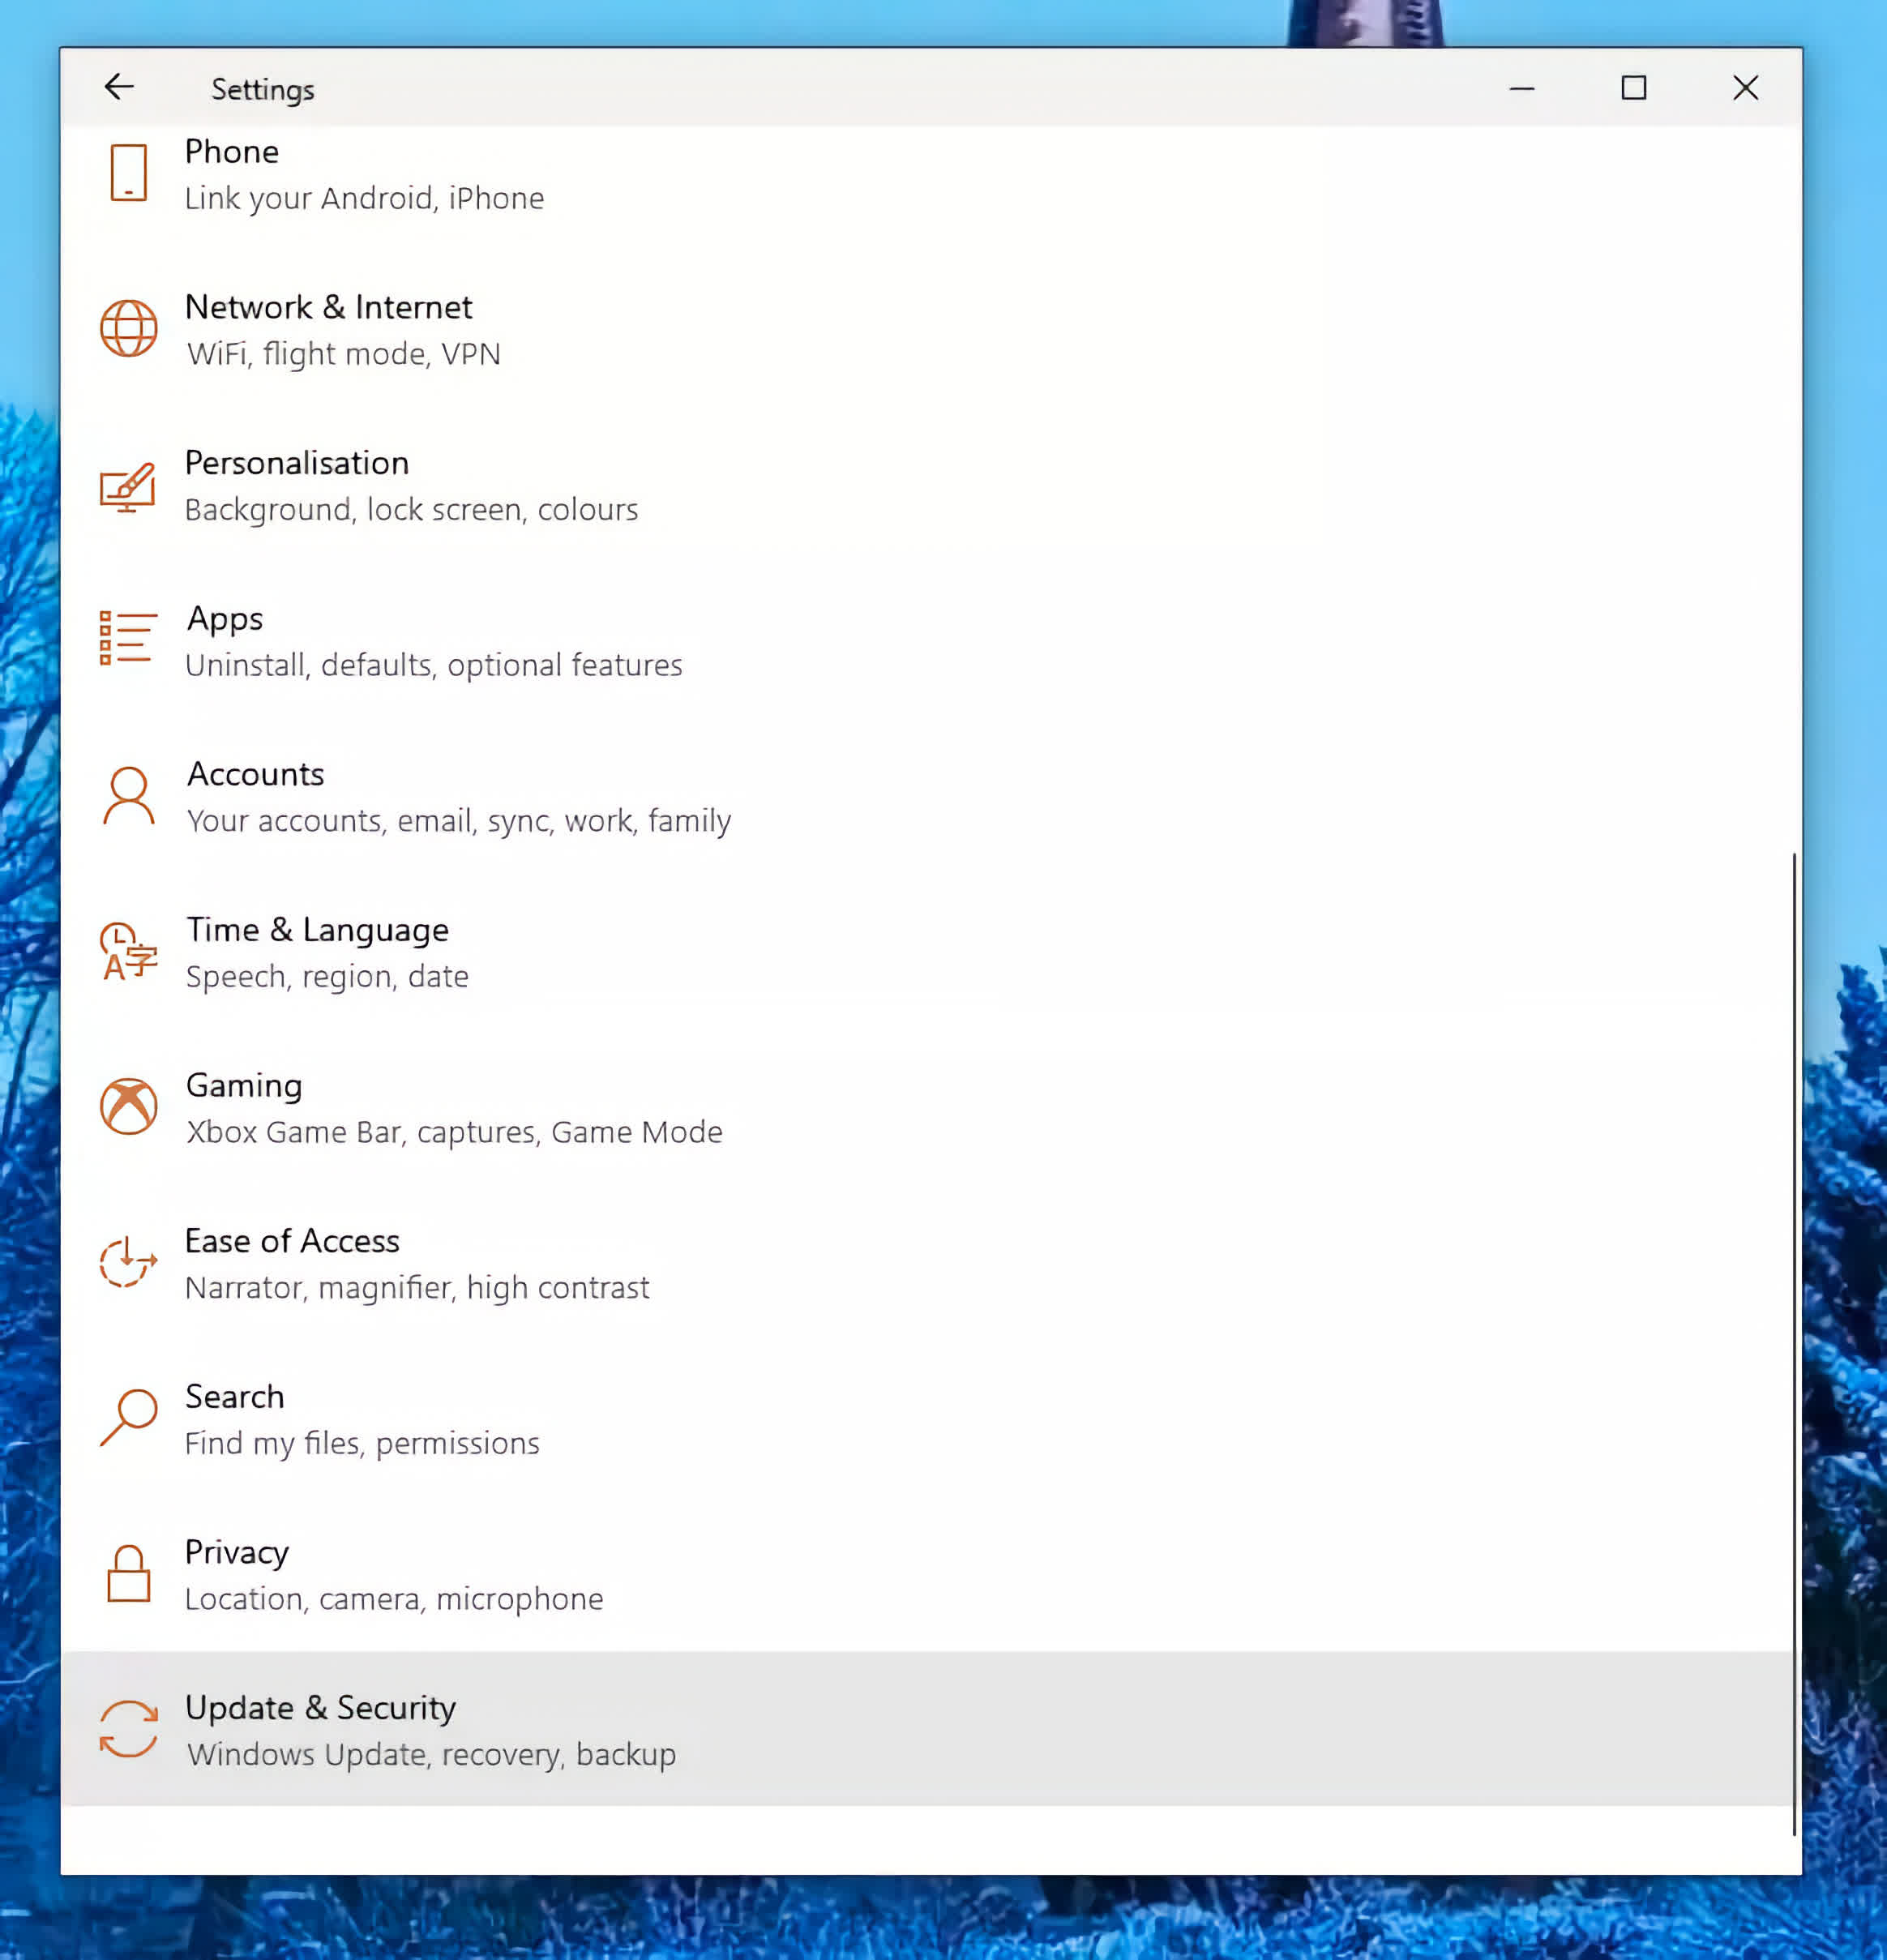
You can set up File History in Windows 10 to use either NAS or an external drive. Because external drives are so popular, it's the most straightforward solution. To set up File History, click Start and then click the Settings gear.
In the system settings window, look for Update and Security and click on it.
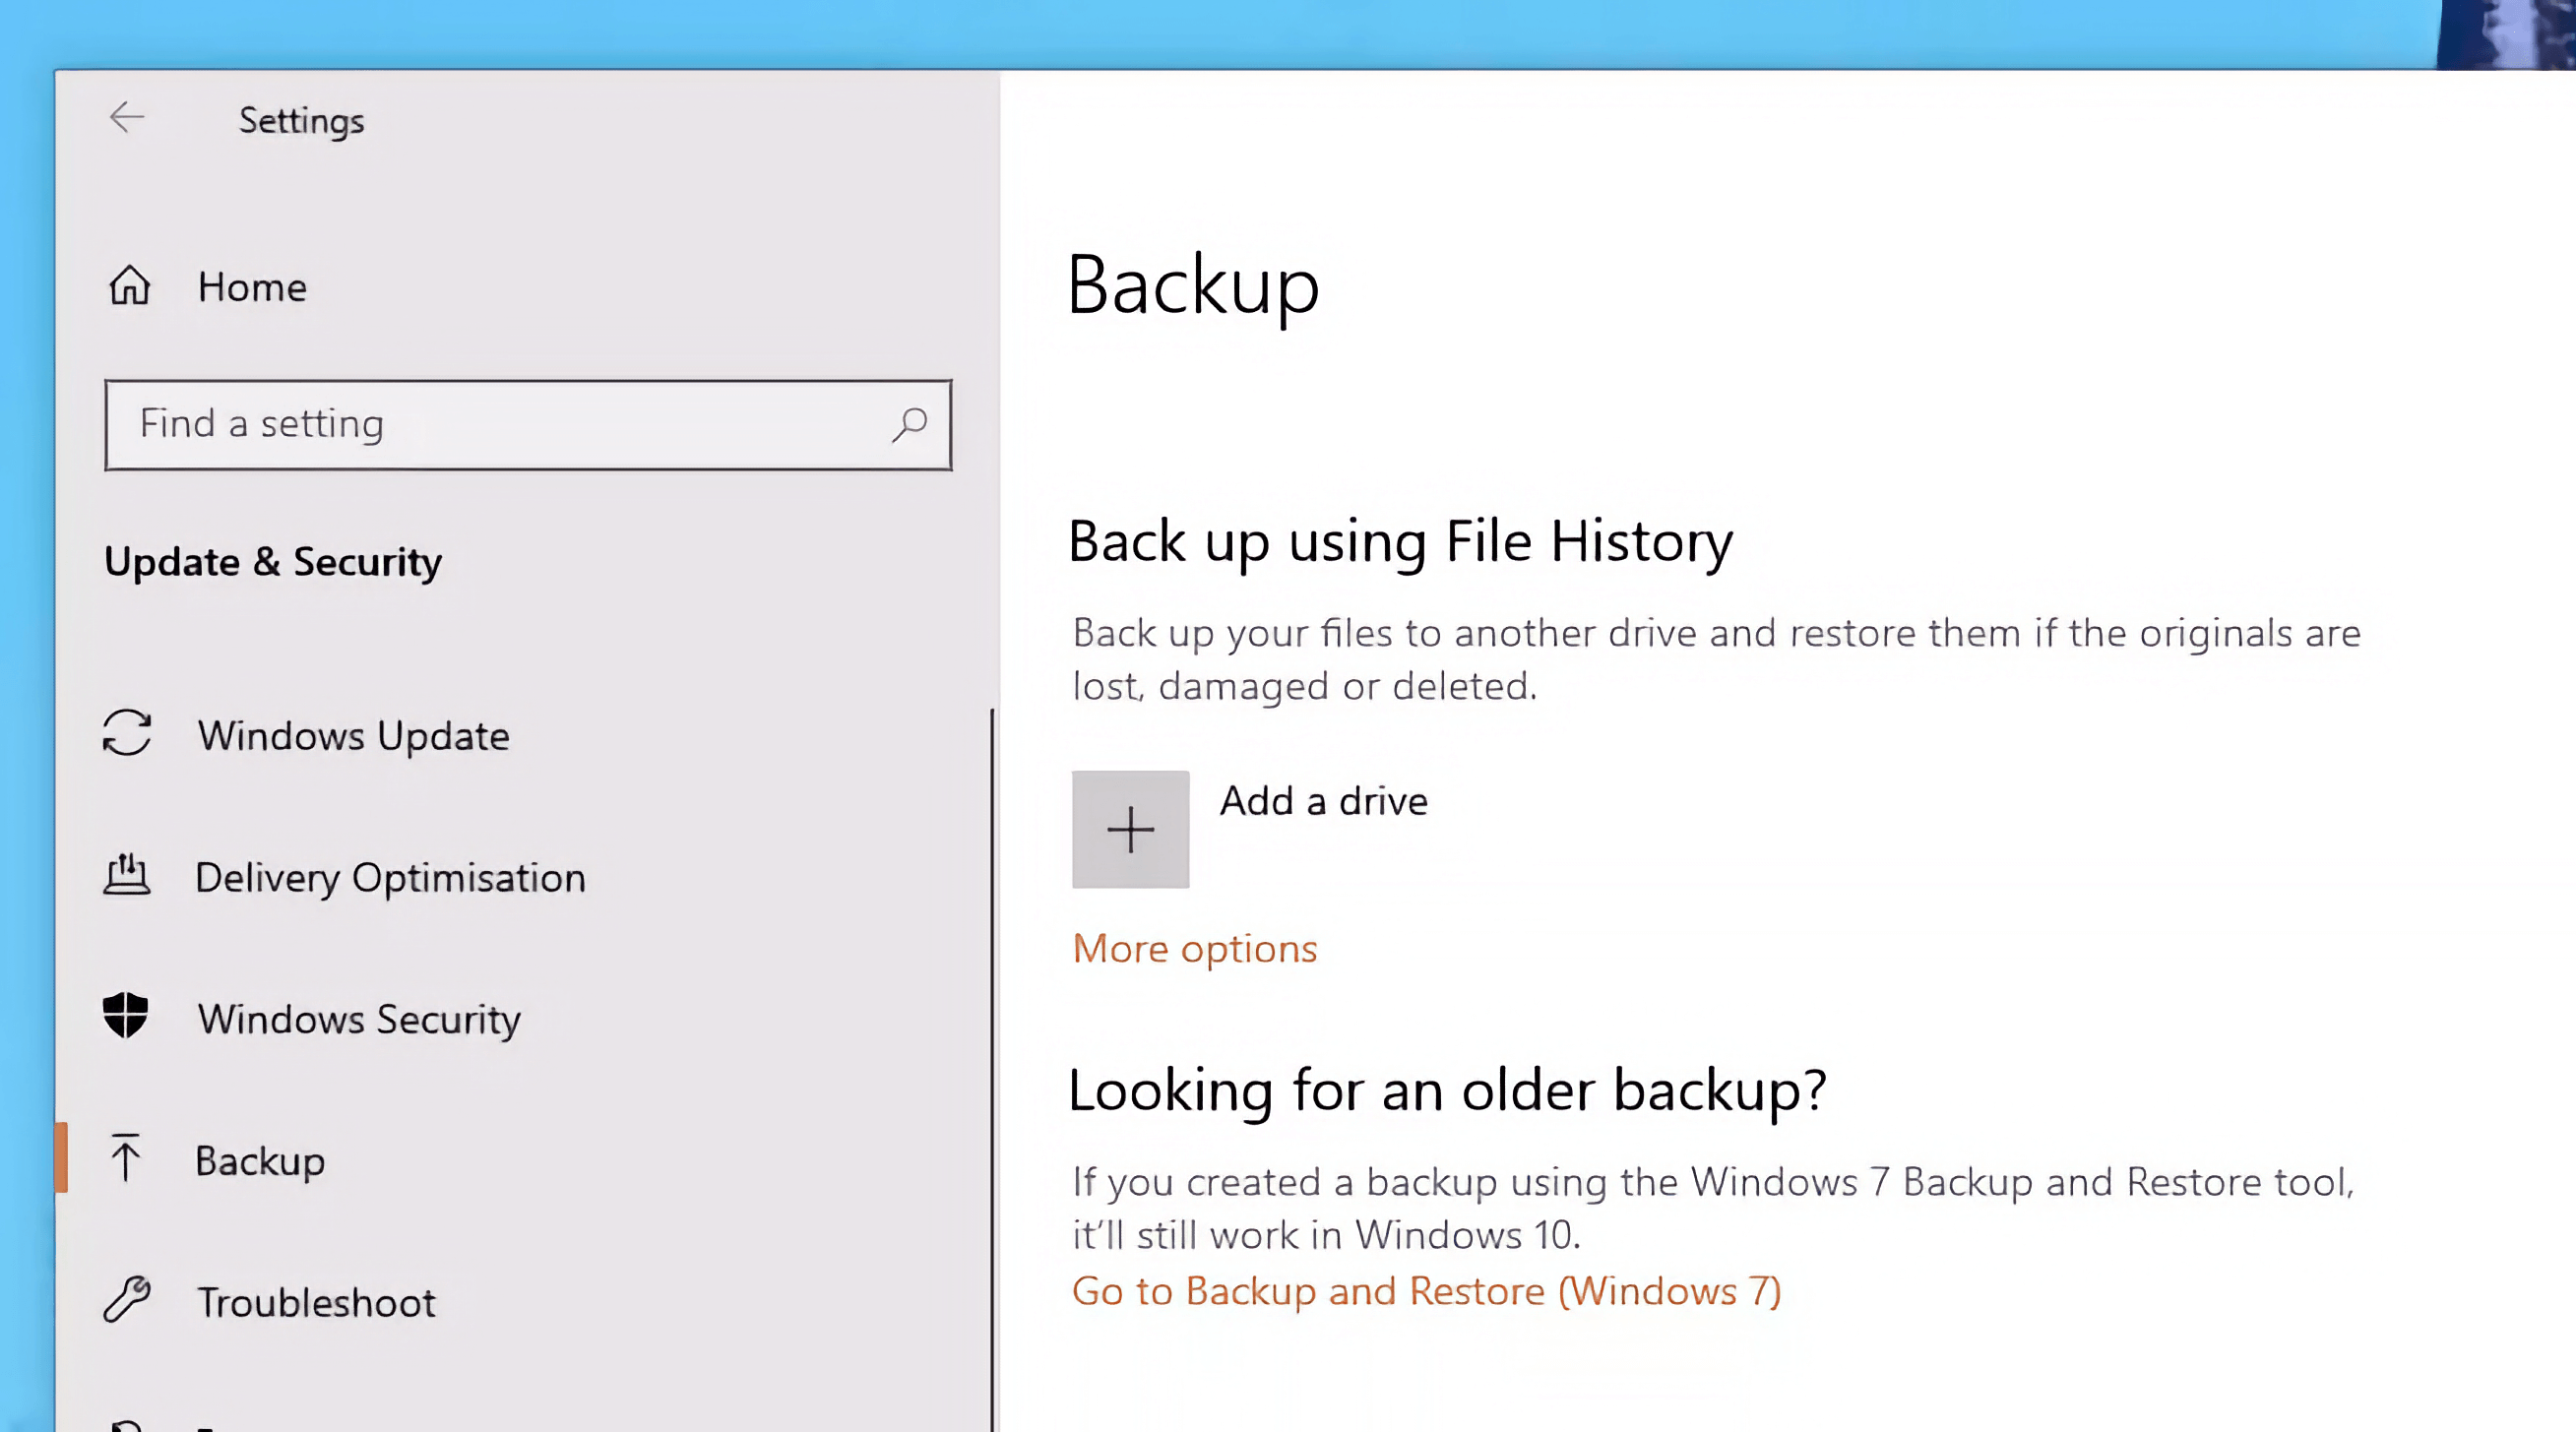
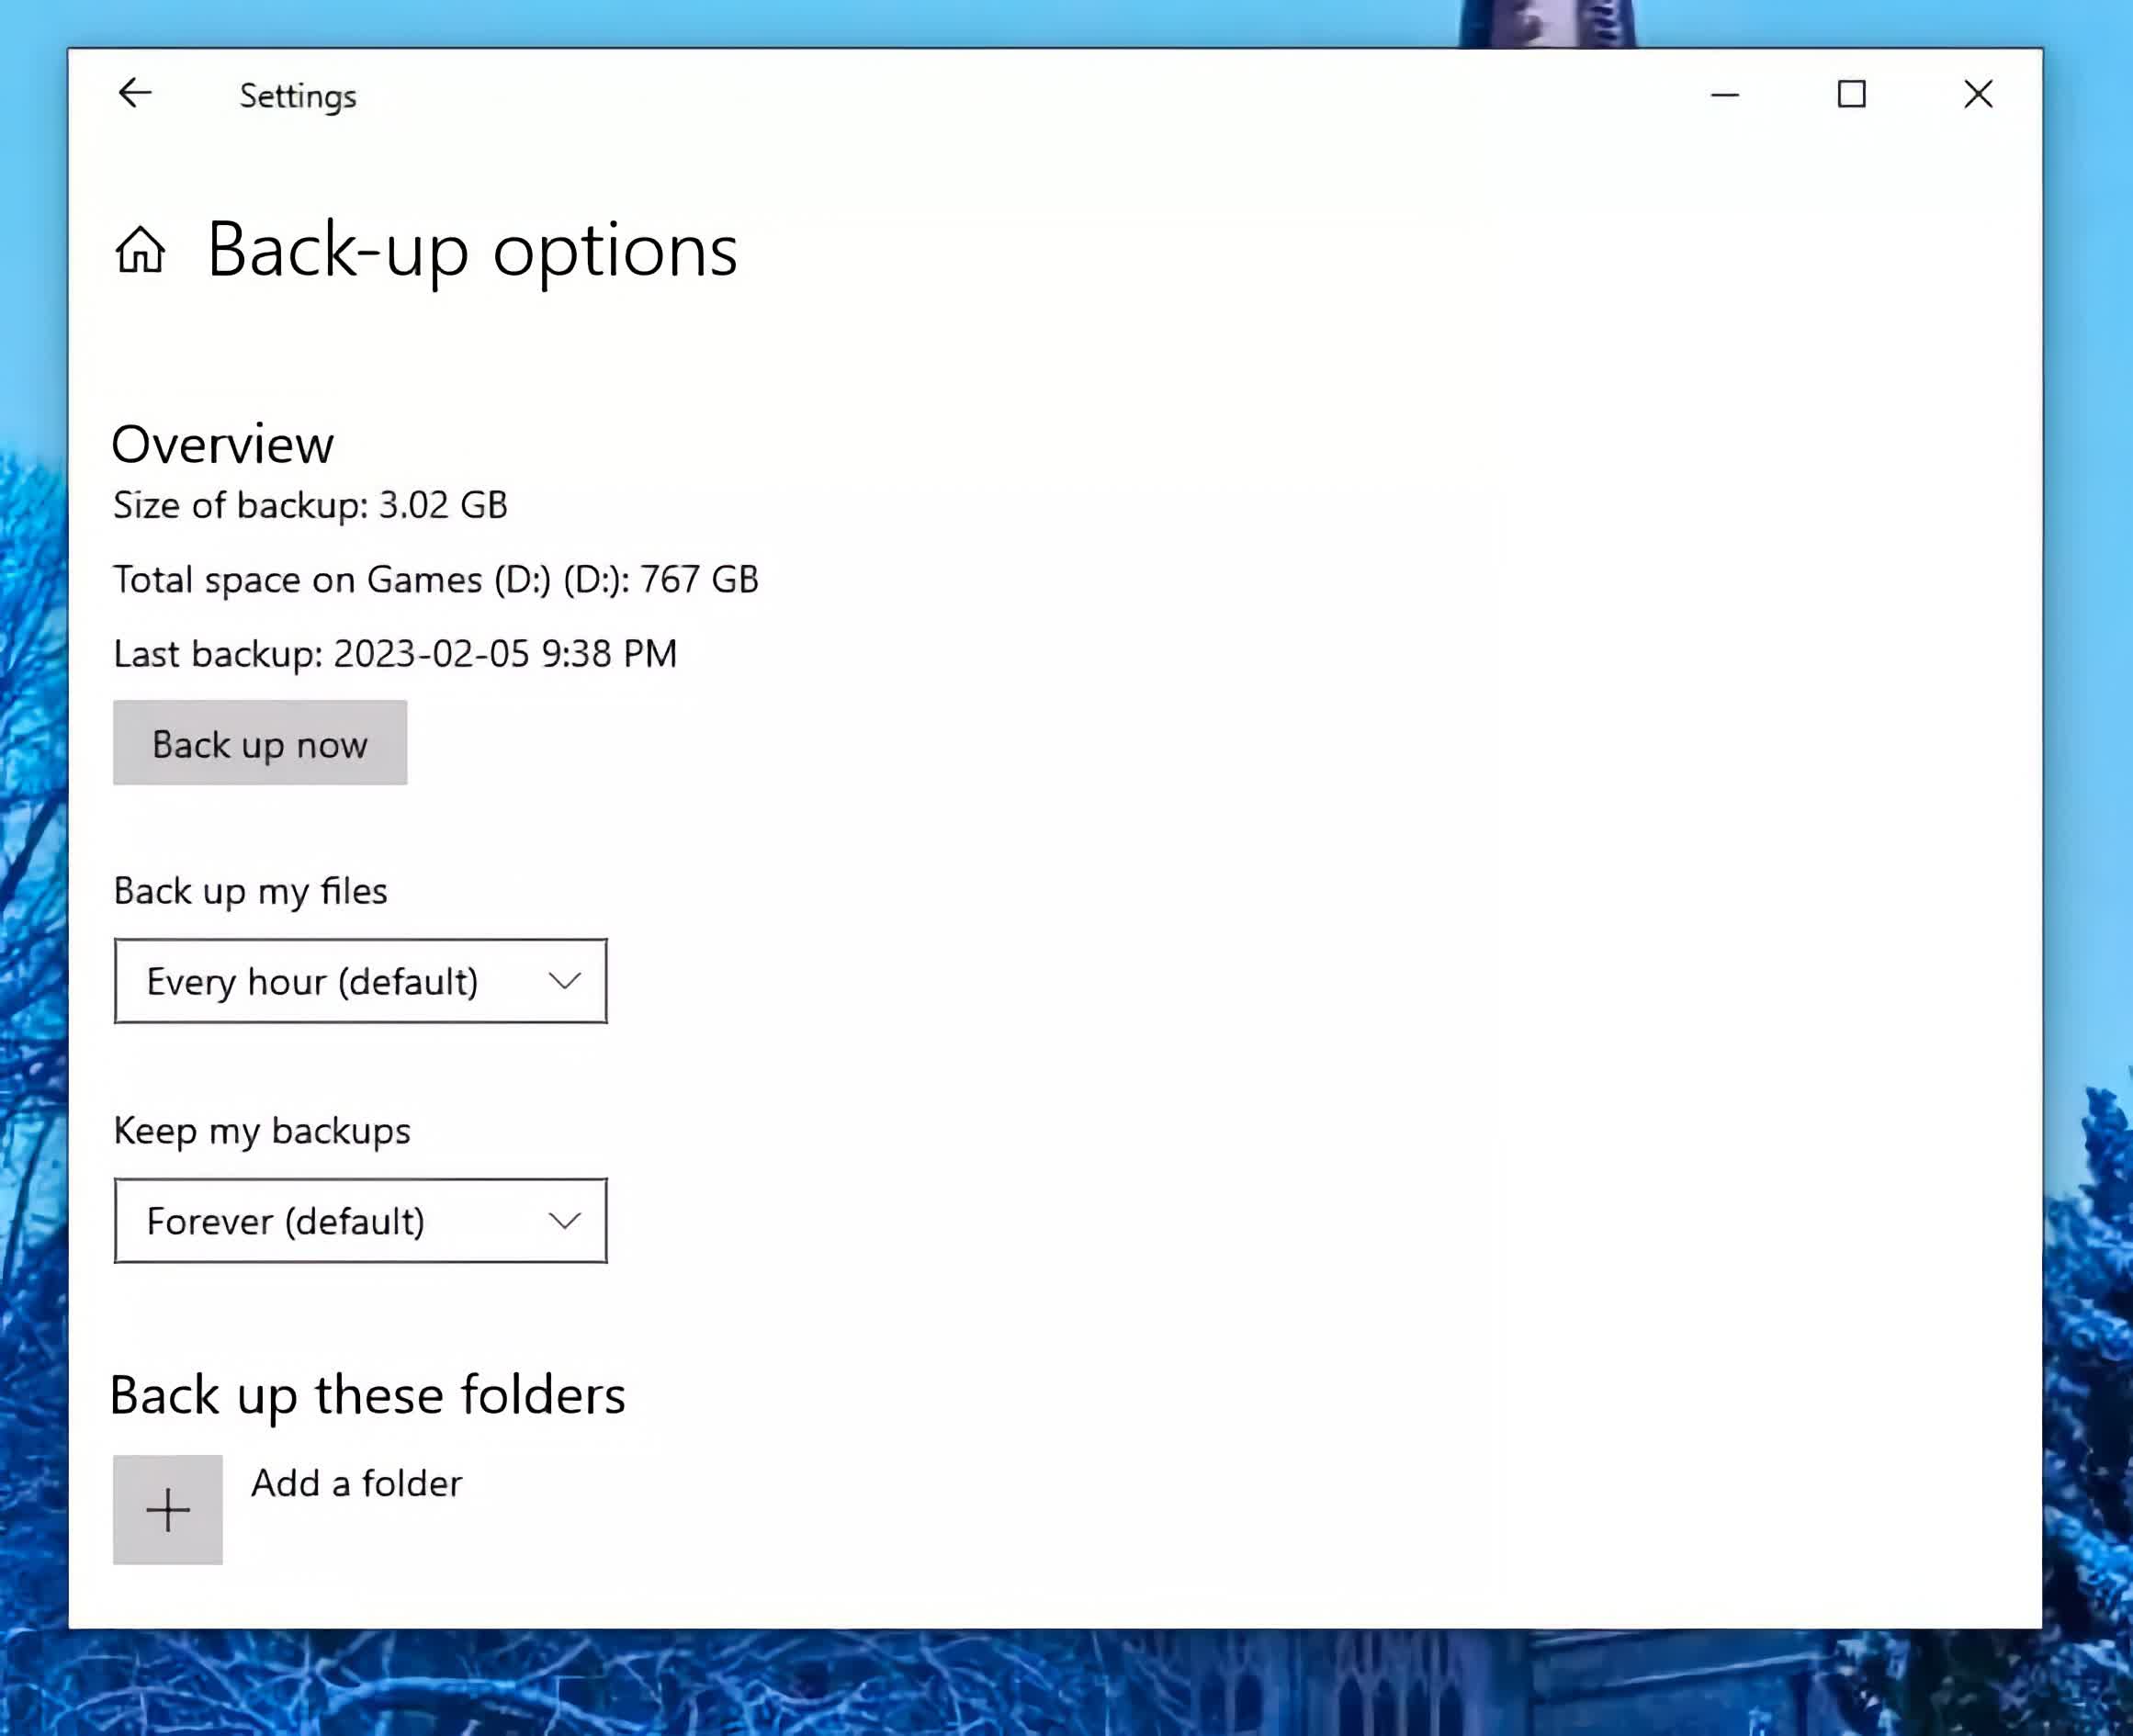
From the left-hand menu, click on Backup. You'll need to tell Windows which drive to use for your backups. Click the plus button beside "Add a drive" to select your external drive.
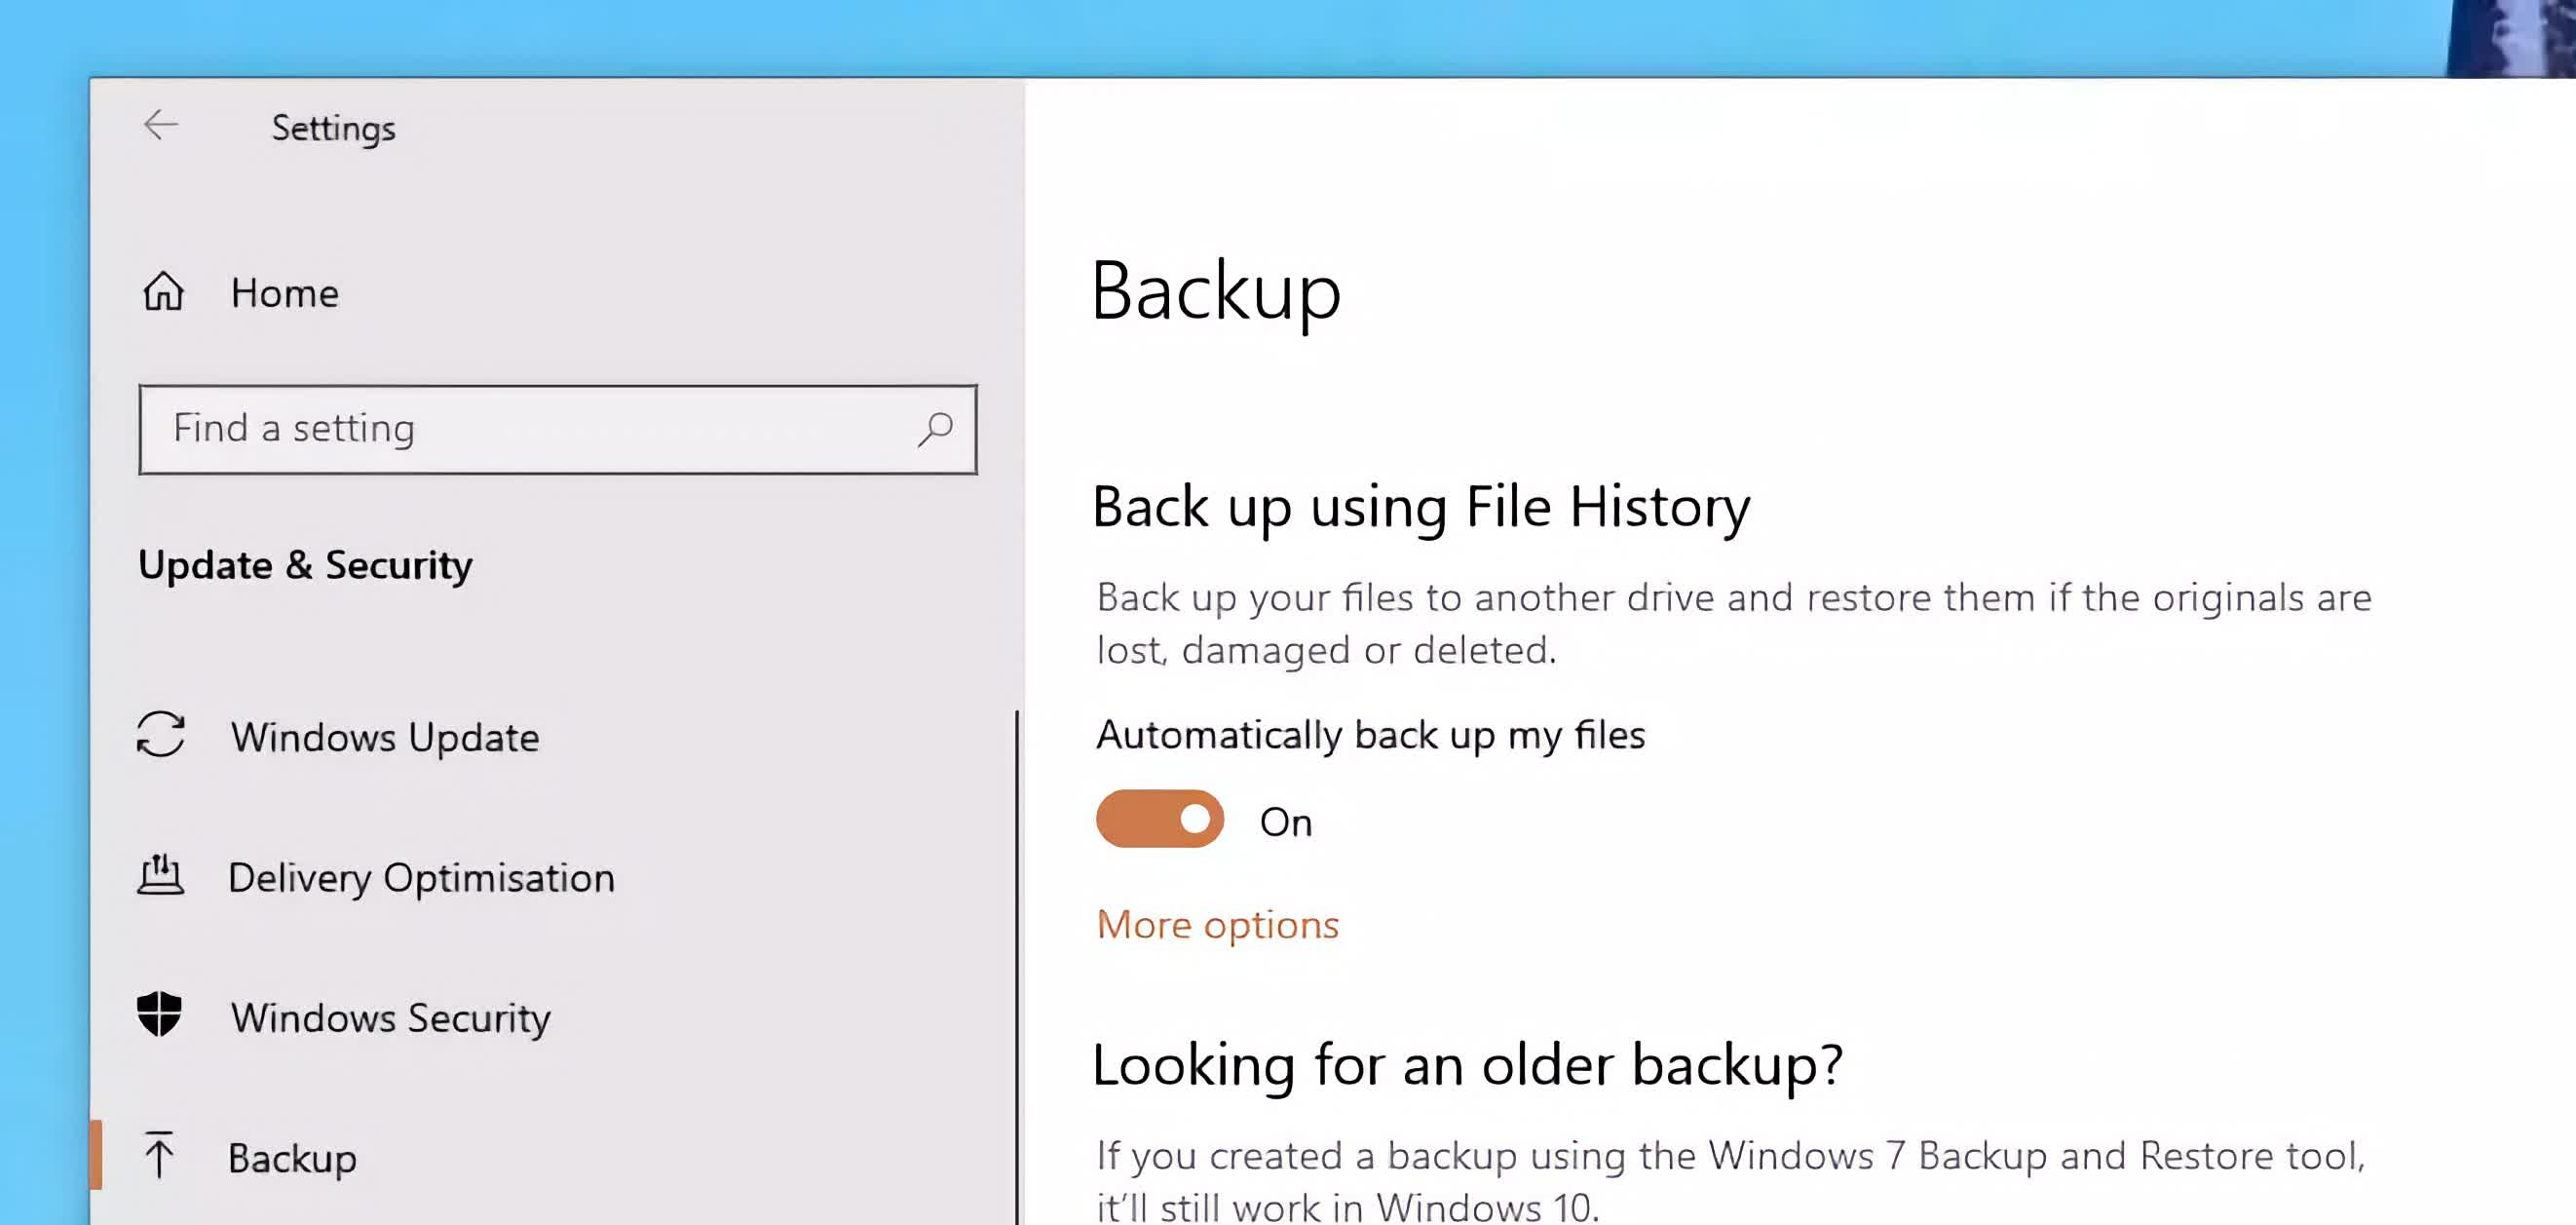
A list of available drives will appear with your external drive at the top. Click your drive name to select it. A slider switch will now appear called Automatically back up my files.
To enable File History backups, slide the switch to the right.
If you want to customize the frequency of the backups or most importantly what gets included, click more options below the slider for those options.
By default Windows 10's File History backups user account folders such as Documents, Music, Pictures, Videos, and Desktop, but you also get a straightforward option to add folders that are not included.
That's it. Your files are now getting automatically backed up!
From this window, you can customize the frequency of the backup, how long to keep files, add files to the backup, or change the drive you're backing up to.
Windows 11
Microsoft pushes Windows 11 users towards their OneDrive cloud storage service for backups by removing some of the functionality that Windows 10 gets, which is unfortunate. OneDrive and other cloud services are certainly encouraged as a backup strategy, but not at the cost of Microsoft nerfing the OS' built-in feature.
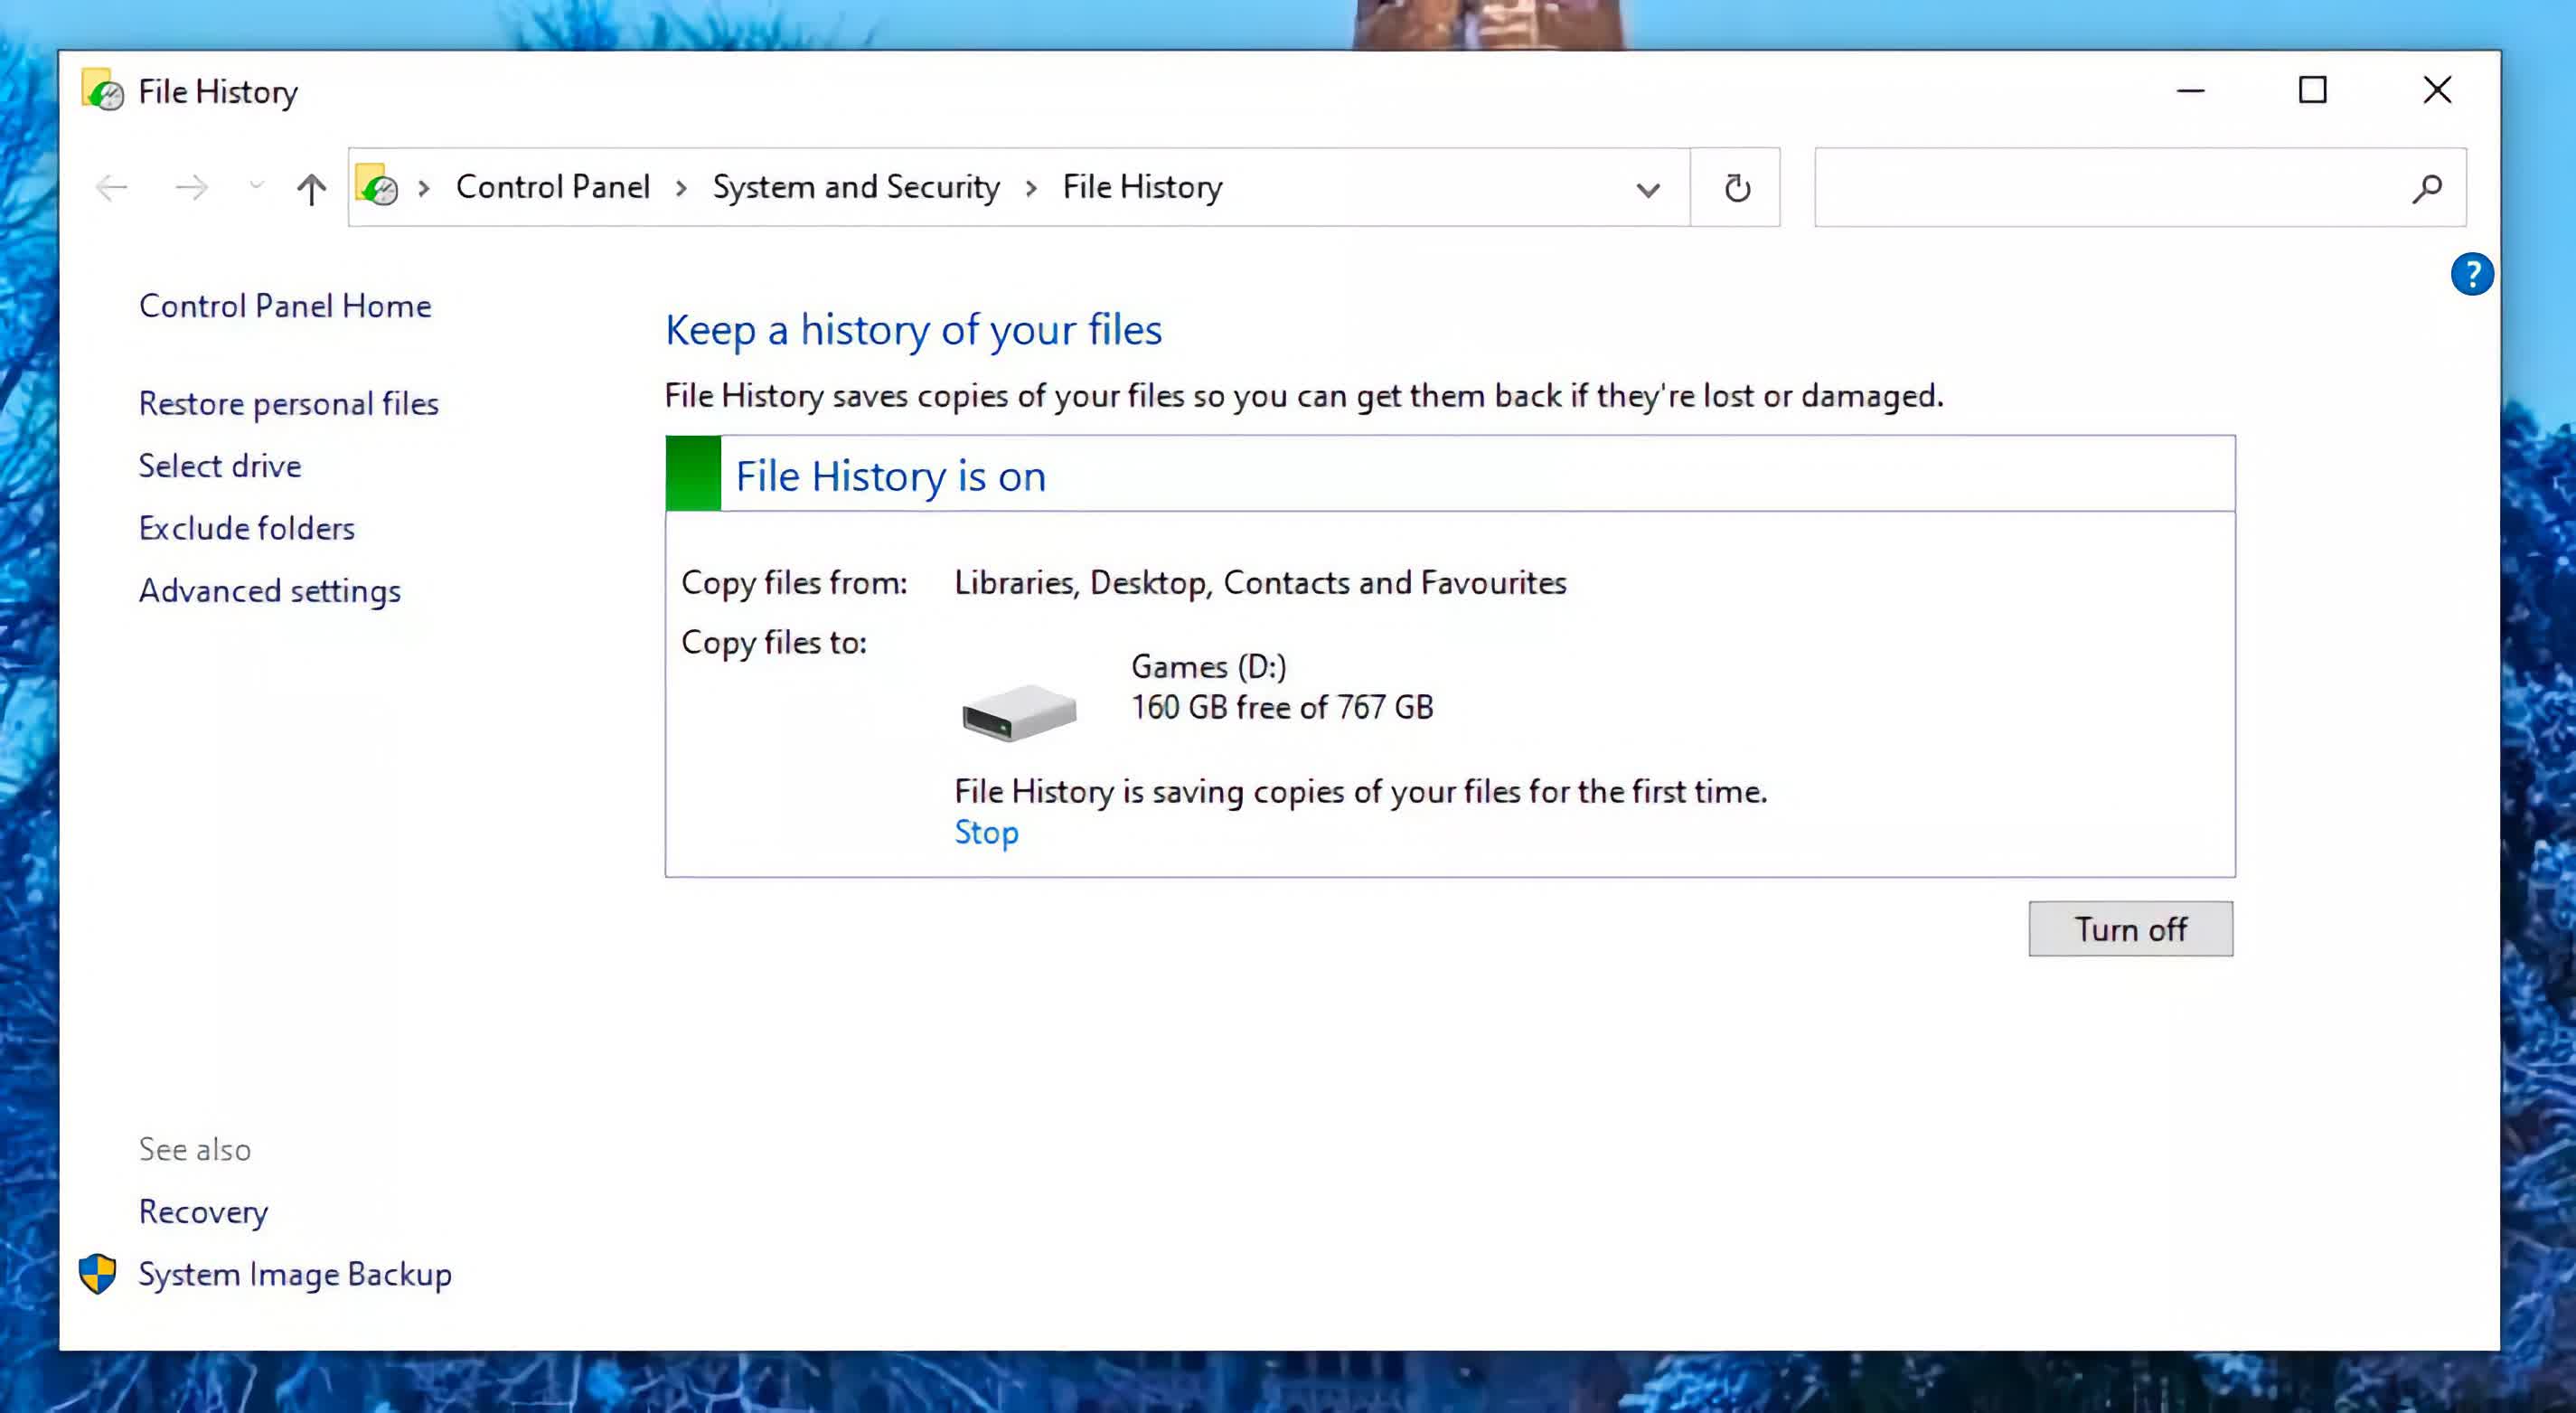
As before, connect your external drive, press Start and type "File History" into the search bar to find the option. In Windows 11, File History has been kind of buried into the old Control Panel, which is not a good sign. With the File History settings open, Windows 11 will automatically try to find and select any external drives on your computer.
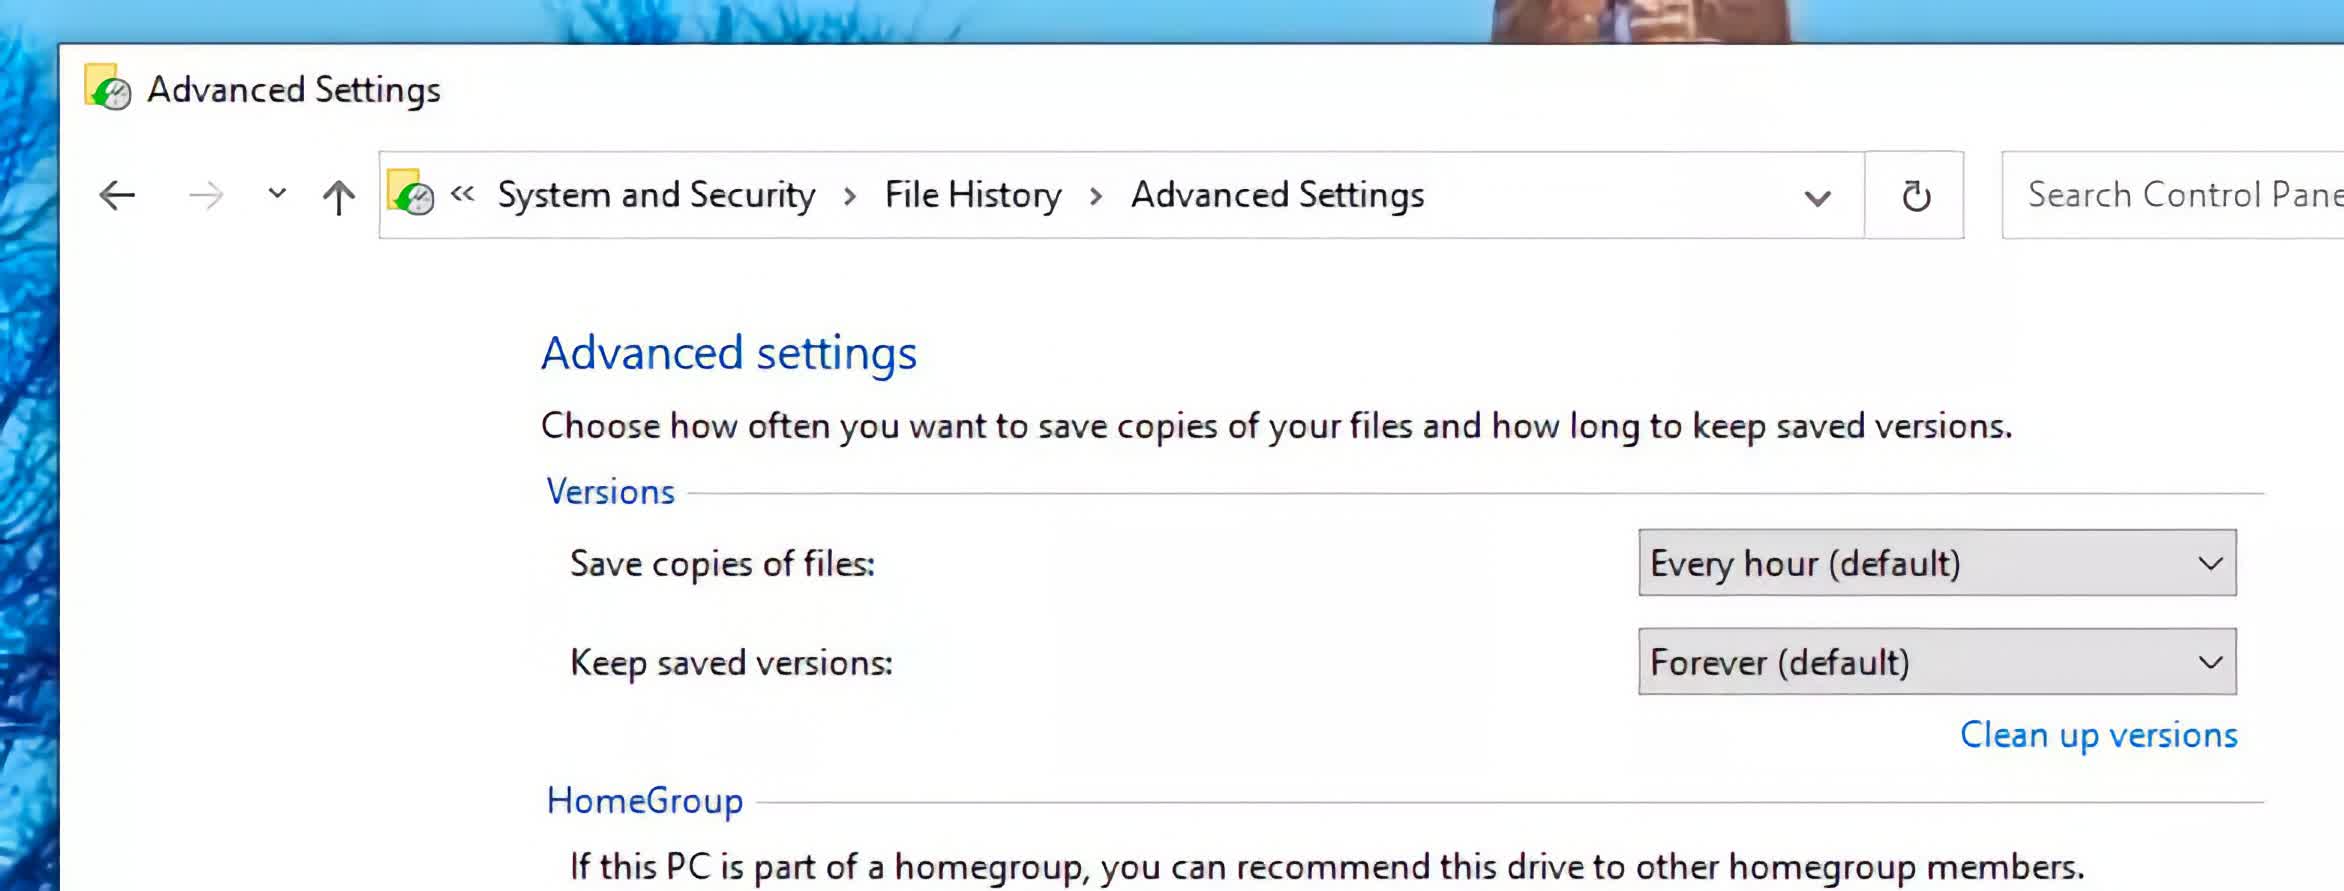
Click the Turn On button to enable File History. You can trigger a backup of your files by clicking the Run Now button. You can customize how File History works in Windows 11 by clicking on Advanced Settings.
Here you can adjust the frequency and length of time documents get kept. You can't add folders to the backup in this same window, which might leave some of your important files out. There is a workaround for this however.
To add folders to your backup, open File Explorer and right-click on the folder you want to add. Select "Show more options" for the full context menu and then select "Include in library." By adding folders to a library (for example "Documents"), these will get added to the File History backup.
Restoring files from a backup
When the inevitable does happen, like hardware failure or accidentally deleting important data, you can restore the lost content quickly from File History.
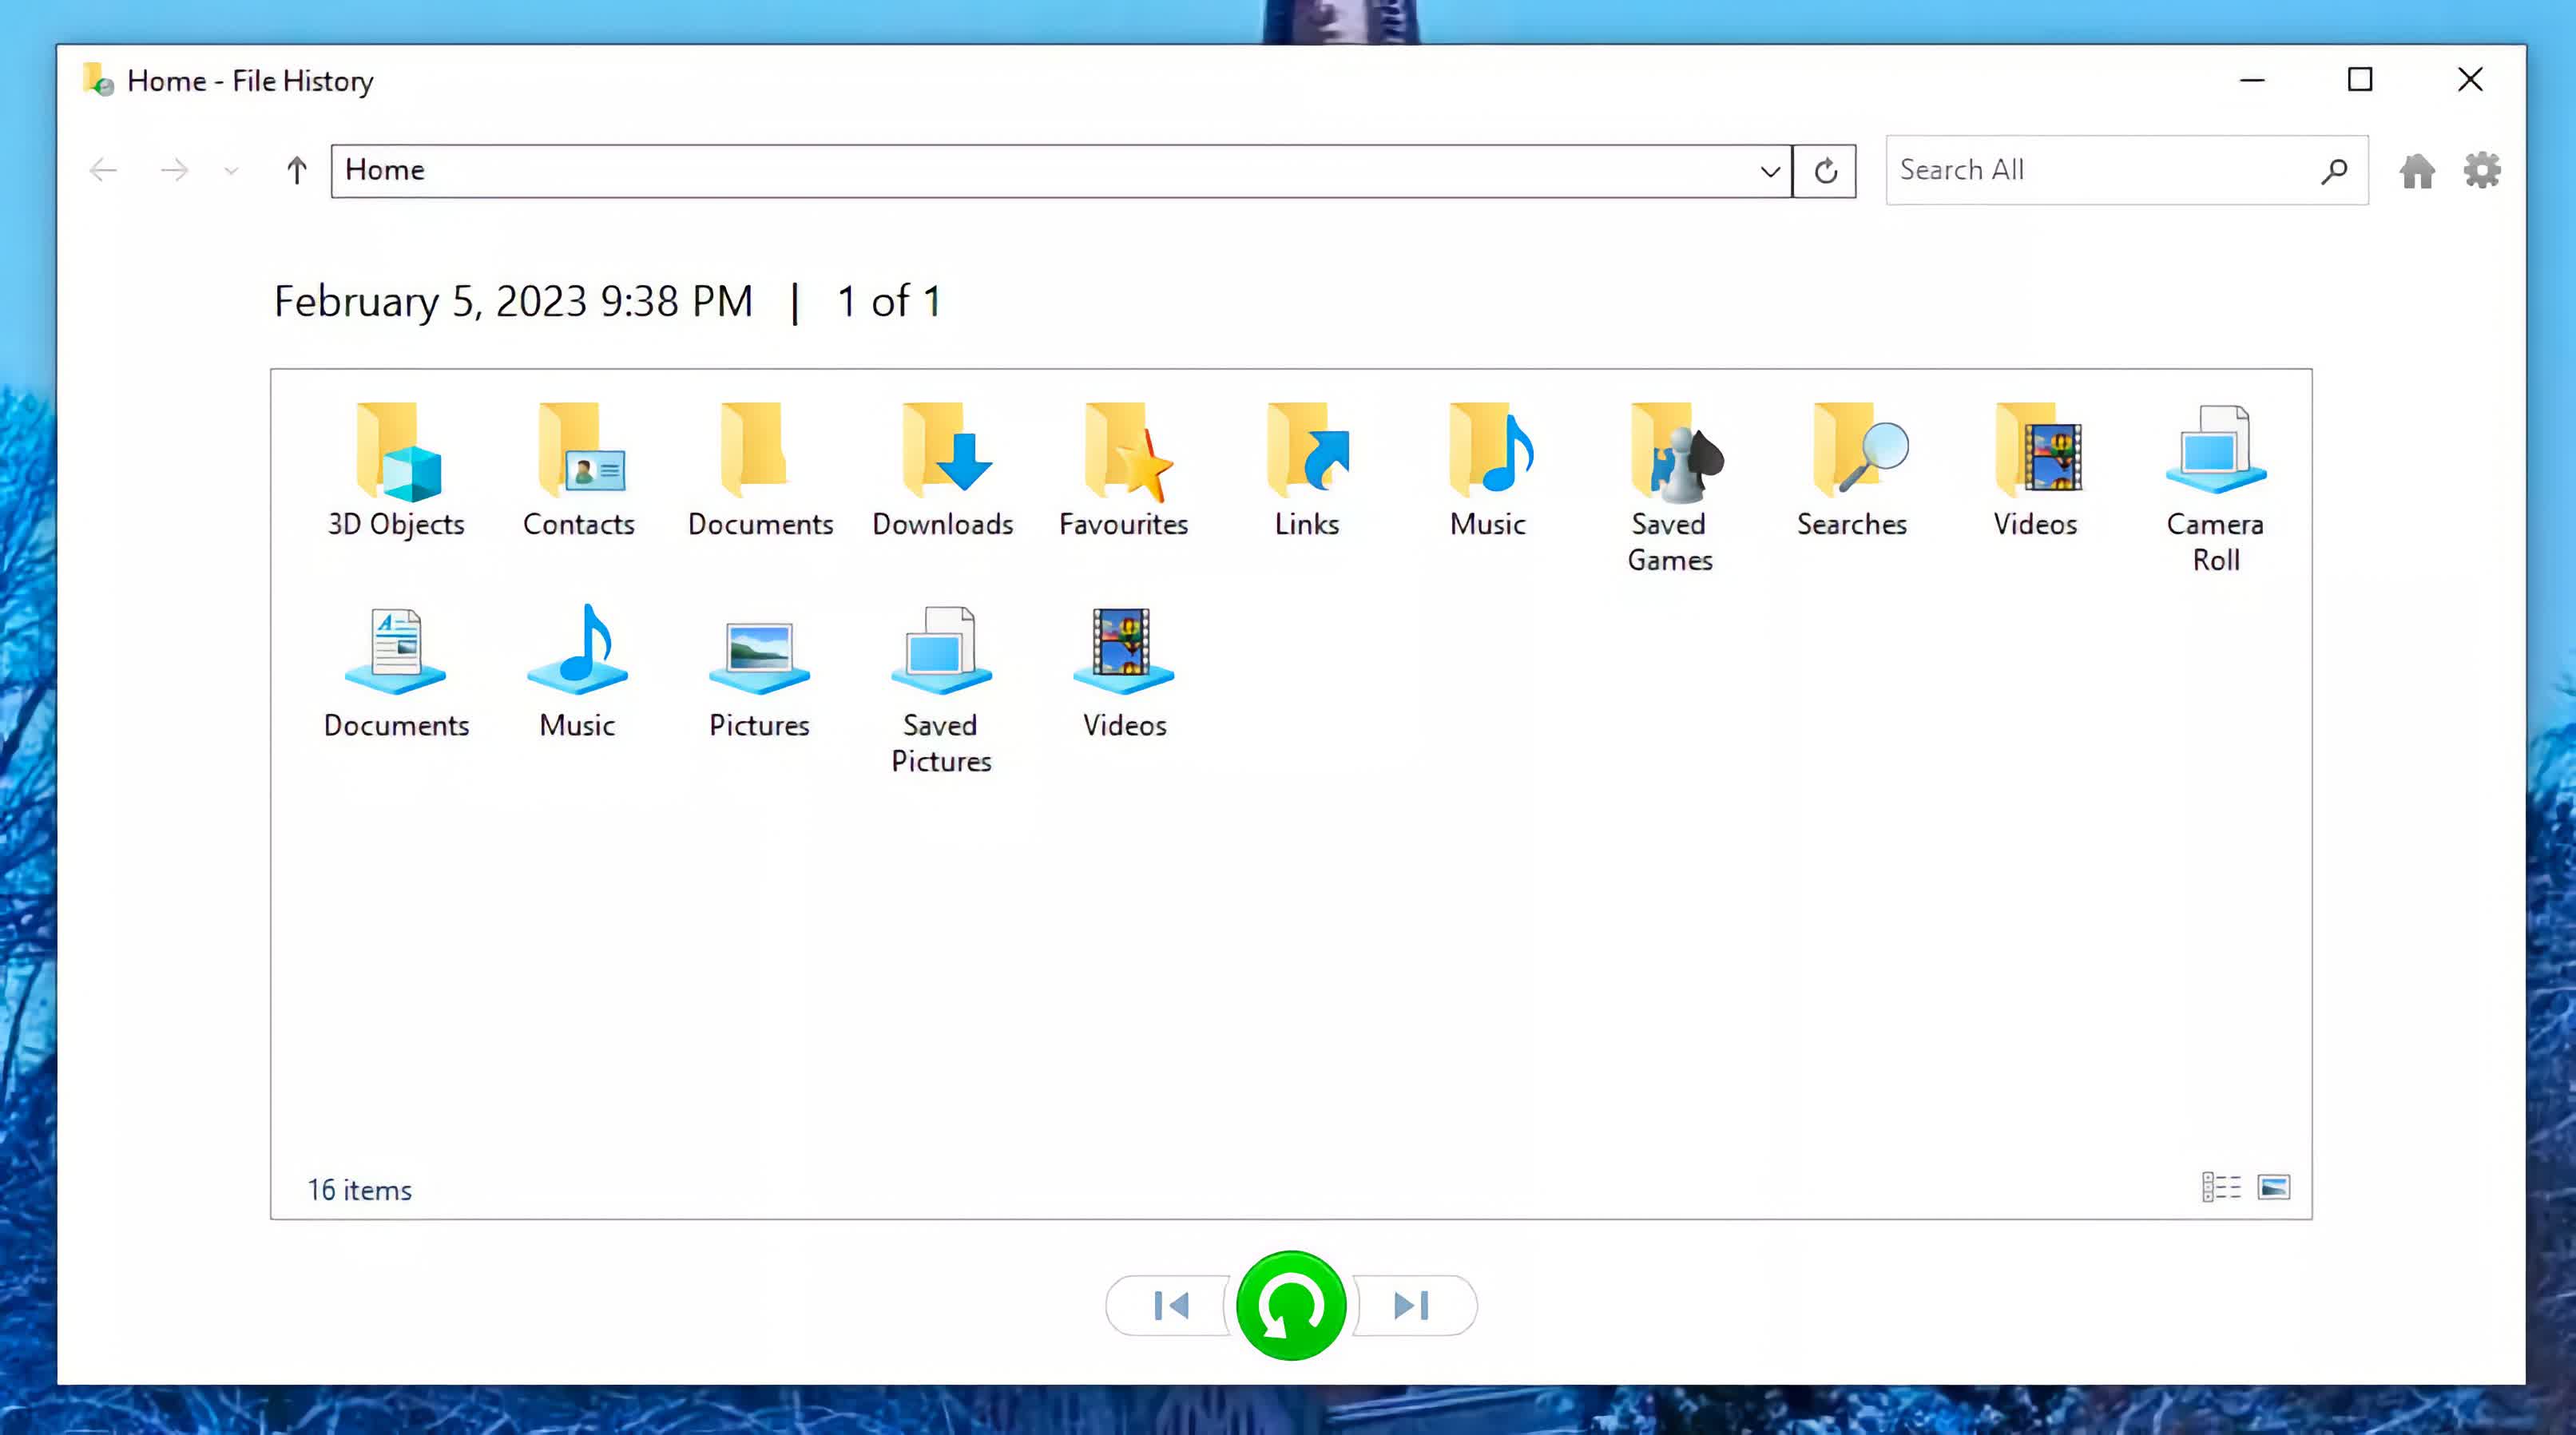
To restore your files, ensure the external drive you use with File History is connected. Press Start and type / run "Restore your files with File History." This will open a window displaying the files and their versions you want to restore. Select the items that need to get restored, then press the green restore button.
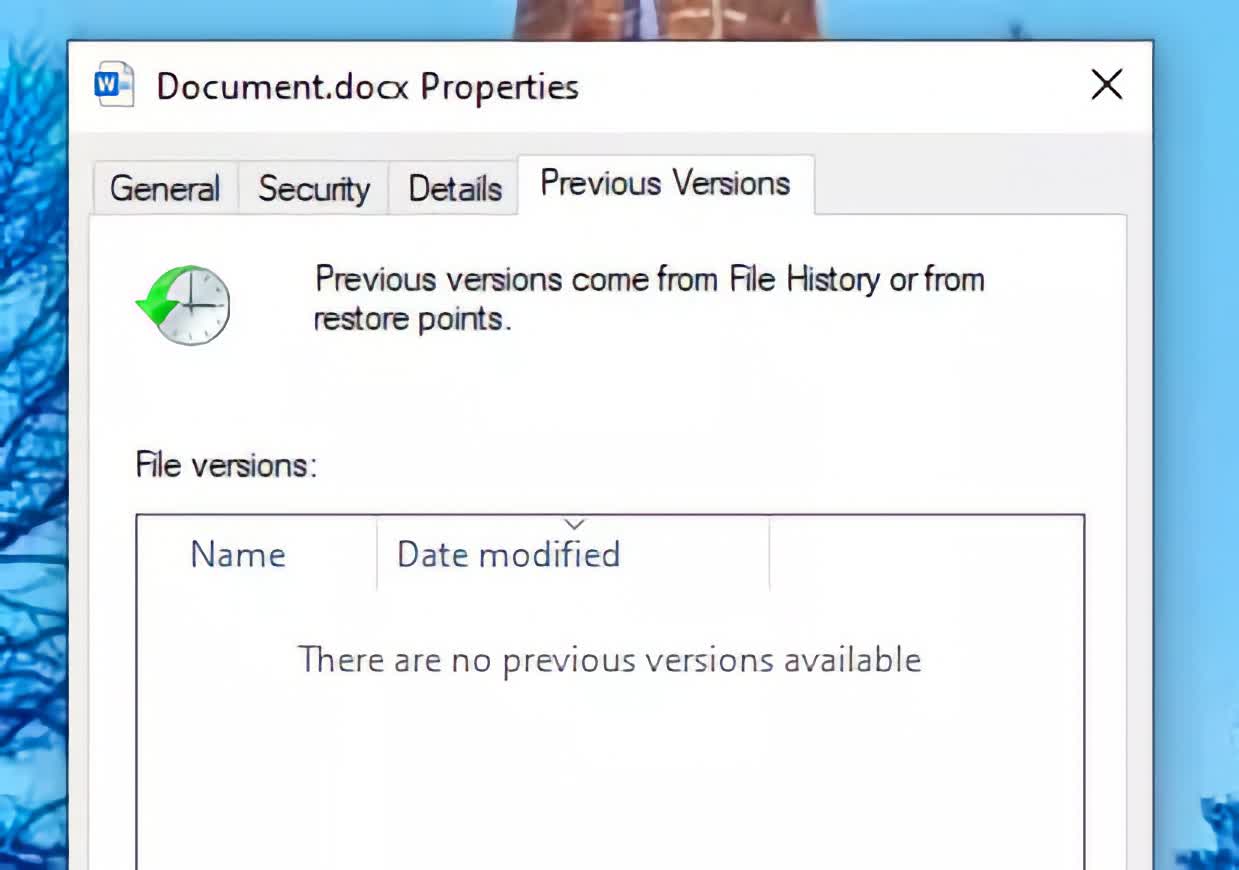
Alternatively, every time you want to restore a previous version of a file, you can browse to its location, right-click on the file, then go to Properties.
Select the Previous Versions tab to display a list of backed-up files.
If you don't see anything, make sure your external drive is connected and try again.
Using the cloud to backup files
Keeping an external drive handy and plugged in is not everyone's favorite backup strategy. If the drive ever gets lost, so are your backups. Thankfully, there are plenty of cloud options available for you to choose from. If you don't need a ton of storage for essential files, you can also get away with free options while leveraging cloud services.
Microsoft integrates OneDrive cloud storage with Windows. OneDrive includes up to 5GB of free storage for everyone, which is a nice way of backing up important files without much effort and without subscribing to a paid service. You can configure OneDrive to sync your documents and pictures to the cloud automatically. This backup will also keep previous versions of the files that get uploaded and a 30-day recycling bin to recover accidentally deleted items.
But OneDrive isn't the only cloud provider available. You can also check out Google Drive or Dropbox (among others). Google gives you 15GB for free and also lets you automatically backup files to the cloud. Dropbox's free tier only gets you 2 GB but includes good integration into Windows File Explorer.
While using one of the free cloud services is the most ideal, if you need a lot of storage, using File History and an external drive is a great way to ensure your files get safely backed up.

